The most popular advice about Excel garment manufacturing is to download a tech-pack template and fill in the blanks. That's backwards. A template can organise information, but it can't decide how a factory measures an armhole, which sample governs approval, or whether a changed fabric invalidates the original tolerance.
Start with specification rules, then build the workbook around them. Excel remains useful when you control inputs, protect calculations, and preserve approval evidence. Without those controls, a polished spreadsheet is just an attractive way to send conflicting instructions.
Table of Contents
- What a Garment Manufacturing Workbook Must Do
- Workbook Tabs and Fields at a Glance
- How to Build the Measurement and Grading Tab
- Linking Costing and Size Breakdown Sheets
- Sample Workbook Walkthrough for One Style
- AQL Sampling and Defect Classes in the Quality Tab
- When Excel Stops Being Enough
- Traceability Fields for Compliance-Ready Records
- Choose Your Export Format and Next Step
What a Garment Manufacturing Workbook Must Do
An Excel garment manufacturing workbook is a controlled specification set that a factory can build from. It isn't merely a garment illustration, a size chart, or a costing sheet. Its job is to connect the product's appearance to measurable production instructions.
The workbook performs distinct jobs: measurement and grading, bill of materials, costing, order size breakdown, and production quality. Traceability records identify the evidence behind materials, while export settings determine whether suppliers can read the instructions. A useful tech pack brings those jobs together without forcing factory staff to reconstruct decisions from email.
Connect instructions rather than copying them
Use linked tabs inside a master file, with style identification and approval status visible on the cover. Give components stable item codes so the same material can be followed from specification through purchasing and costing.
Consider a waistband elastic entry. The BOM holds its width, supplier reference, purchasing unit, and consumption per garment. Costing reads that consumption and the quoted price; purchasing multiplies the approved consumption by order quantities. Changing the elastic specification should update its dependent calculations, not require someone to remember every place it was typed.
Each reader needs a different answer quickly:
- Designer: Find the approved silhouette, colour placement, and visible details.
- Technical designer: Find measurement methods, fit decisions, and approved size specifications.
- Sourcing team: Find component identities, consumption, supplier references, and quote status.
- Factory production team: Find cutting, sewing, finishing, and inspection requirements.
Usability test: The factory should be able to cut, sew, and inspect without guessing, and the brand should be able to prove which specification was approved.
Use that test to judge the workbook's structure. A missing field matters more than an attractive cover.
Workbook Tabs and Fields at a Glance
Use this tab map as a working audit checklist. Each row identifies a tab, the production job it performs, its minimum fields, and the person accountable for maintaining it. An owner isn't necessarily the only contributor, but that person controls edits and resolves conflicting inputs.
Core workbook tabs and their key fields
| Tab | Purpose | Key fields | Owner |
|---|---|---|---|
| Cover and Revision | Identify style and version | Style number, season, revision letter, date, approver | Technical designer |
| POM Definitions | Define each measurement | POM code, description, method, diagram reference, tolerance | Technical designer |
| Grading | Hold base and graded values | Base size value, grade increments by size, locked formulas | Technical designer |
| BOM | List every component | Item code, description, supplier, quantity per garment, unit, consumption notes | Sourcing |
| Costing | Build the unit cost | Material, trim, labour, overhead, margin, currency, cost date | Merchandising or sourcing |
| Size Breakdown | Set quantities per size | Colourway, size ratio, total units, cut plan | Merchandising |
| Quality Plan | Set inspection rules | Lot size, inspection level, AQL, defect class, disposition | QA |
| Traceability | Record upstream evidence | Supplier, material batch, certificate, approval history | Sourcing or compliance |
| Revision History | Log every change | Date, owner, reason, sample or approval reference | Whoever changes the file |
Make component records specific
These are minimum tabs, not a limit. A knit jacket with printed panels also needs construction instructions, artwork placement, and packaging requirements, whether those sit in dedicated tabs or clearly separated specification pages.
For a lined jacket, don't write “fabric and trims” as a BOM entry. Create separate lines for the shell, lining, interlining, zipper, drawcord, and labels. Each line needs its own supplier reference, purchasing unit, and quantity per garment. A zipper ordered in pieces cannot share a consumption field with lining purchased by length.
Give changes a single home
Assign a named owner wherever the table offers a choice between departments. Shared responsibility without an editor of record makes it difficult to distinguish a sourcing proposal from an approved substitution.
Keep Revision History as the sole change log. Other tabs show their applicable revision reference, but they shouldn't maintain competing narratives about what changed. The person making an edit records it; the technical designer controls release of the updated specification.
Audit the current workbook against every row. List missing tabs and incomplete fields, assign an owner to each gap, and separate missing information from information awaiting approval. Start with POM definitions, because an ambiguous measurement can undermine otherwise correct grading and inspection.
How to Build the Measurement and Grading Tab
Every point of measure, or POM, needs a unique code and a plain-language description. “Chest” isn't enough: the factory needs to know where the measurement starts, where it ends, and how the garment is positioned.
Build the measurement logic before formatting the sheet. This workflow keeps identification, grading, and review connected.
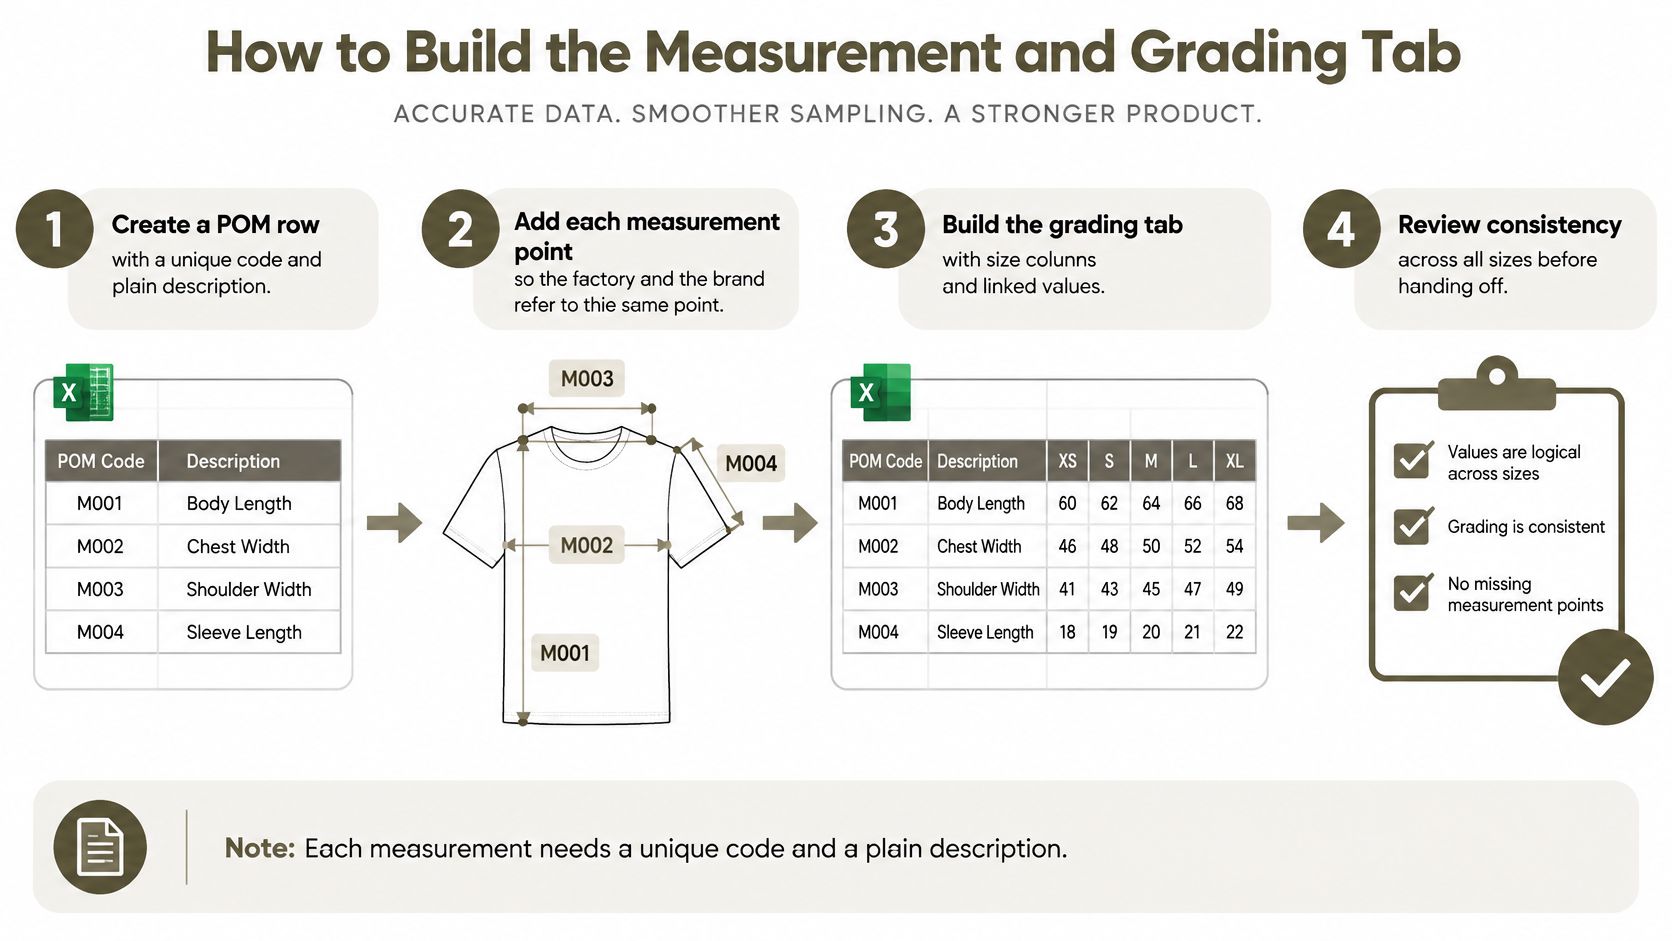
Build the specification in sequence
- Create the POM row. Assign a stable code and a description that identifies the actual garment dimension, not a shorthand only the designer understands.
- Record the measurement method: flat, along the seam, from high point shoulder, or after specified relaxation and pressing. State whether closures are fastened and whether elastic is relaxed or extended.
- Add the diagram reference. Match it to a labelled technical drawing so the inspector can locate the measurement without interpreting a photograph.
- Enter the approved base-size value from the signed-off sample. Keep proposed fit corrections separate until someone authorised approves them.
- Build size columns with locked formulas. Store grade increments in controlled input cells, and make clear whether each increment is relative to the base or the adjacent size.
- Assign a measurement tolerance, then assess it against construction, fabric behaviour, and the dimension's importance to fit. Don't give a neckline opening the same treatment as a non-functional decorative placement.
- Apply conditional formatting to inspection results. Compare the measured sample with that size's approved target and permitted deviation, not with the base-size target.
- Freeze the approved specification before bulk cutting. Record later changes with their date, owner, reason, and approval reference rather than replacing values.
Set tolerances deliberately
The Sareteks tech-pack guide gives starting woven-apparel tolerances of approximately ±0.5 cm below 30 cm and ±1.0 cm at 30 cm or above, subject to validation against the approved sample, fabric behaviour, and buyer requirements.
Starting tolerance benchmarks for woven apparel
| Measured dimension | Starting tolerance | Validate against |
|---|---|---|
| Below the shorter-dimension cutoff | Smaller deviation allowance stated above | Approved base sample |
| At or above the longer-dimension cutoff | Larger deviation allowance stated above | Fabric behaviour and buyer specification |
| Stretch knit measurements | Set from fabric testing and buyer requirements | Fabric test results and buyer specification |
For a hypothetical armhole in the shorter-dimension band, start with the smaller allowance; a chest width in the longer band starts with the larger allowance. Neither becomes final merely because a formula selected it.
For stretch knits, enter the test reference in the POM record before freezing the tolerance. Specify relaxation and measuring tension, because identical numbers can describe very different garments when one inspector stretches the fabric and another doesn't. Once garments are sewn, the quality plan determines how out-of-tolerance findings are classified and handled.
Linking Costing and Size Breakdown Sheets
Move information in a clear direction: BOM consumption to costing, then order quantities to material requirements. The BOM should distinguish net consumption, cutting allowance, and wastage so sourcing doesn't add the same allowance twice.
Costing multiplies purchasing consumption by the quoted unit price. It then adds trims, cut-make-trim labour, packing, and overhead, with currency and quote date visible. Keep target margin separate from production cost, and label whether your pricing formula uses margin or markup.
Calculate by size rather than by habit
Consider a hypothetical colourway order of 1,200 units with an S:M:L:XL ratio of 2:4:4:2. The resulting quantities are 200, 400, 400, and 200 units. If its hypothetical shell consumption is 1.35 m for S and 1.45 m for M, those sizes require 270 m and 580 m, respectively, before any separately defined allowance.
Calculate the remaining sizes using their own consumption, then sum the requirements. That's more useful for production planning than applying a convenient average to every size.
- Order reconciliation: The breakdown total must equal the order quantity on the cover.
- Material reconciliation: Extended material costs must match approved consumption, order units, and quoted prices.
Keep numeric cells numeric and validate imported values. Excel's SUM can ignore text-formatted numbers, while other formulas may return errors or coerce them unexpectedly. Use a consistent formula down each calculation column and protect it against accidental replacement.
Sample Workbook Walkthrough for One Style
Build a practice workbook around a hypothetical basic T-shirt. Use colourways such as black, white, and navy, and treat every example measurement as a training input rather than a production recommendation.
Establish the style and fit records
On Cover and Revision, enter a style identifier such as TS-DEMO, the season name, revision letter, preparation date, and technical designer as approver. Add separate preparation and approval statuses so a completed draft doesn't look production-ready.
In POM Definitions, create rows for body length, chest width, shoulder width, sleeve length, and neck opening. For body length, specify measurement from high point shoulder and link to the matching drawing callout. Set knit tolerances only after confirming the fabric test and buyer specification.
In Grading, select the approved base size and link its measurements. Put grade increments in protected input ranges and calculate the surrounding sizes; don't type independently rounded targets into every column.
Complete the commercial and production records
Use the remaining tabs as working records rather than placeholders:
- BOM: Enter jersey, woven neck label, care label, polybag, and thread. Give each an item code, consumption basis, and purchasing unit.
- Costing: Pull component consumption into material and trim lines, then add labour and the agreed commercial assumptions. Record quote currency and date.
- Size Breakdown: Create colourway rows with approved size quantities. Check their combined total against the cover.
- Quality Plan: Enter the lot definition and agreed sampling settings. Leave acceptance fields unresolved until QA selects the applicable sampling plan.
- Traceability: Create a jersey record with a mill name and certificate reference. If the batch identifier is missing, label the evidence pending rather than treating the line as complete.
- Revision History: Record sample approval with its date, reason, approving person, and reference.
Before release, inspect the dependencies. A changed fabric should prompt a review of consumption, fit assumptions, and evidence status, not merely a new BOM description.
Save the .xlsx master before making any supplier export. Keep the approved sample reference attached to that release so the workbook and physical garment remain connected.
AQL Sampling and Defect Classes in the Quality Tab
AQL is a sampling rule, not a promise that every unit is defect-free. The buyer must agree the inspection policy contractually, including defect definitions and what happens when a lot fails.
The TextileTuts guide to ISO 2859 sampling plans describes attribute sampling indexed by lot size, inspection level, and AQL, covering lots from 26 to 500,000 units, with levels S-1 through S-4 and I through III; it also identifies the apparel conventions shown below, zero tolerance for critical defects, AQL 2.5 for major defects, and AQL 4.0 for minor defects.
Defect classes and typical AQL values in apparel practice
| Defect class | Example defects | Typical AQL |
|---|---|---|
| Critical | Unsafe components, prohibited labeling failures | Zero tolerance |
| Major | Open seams, holes, incorrect measurements, wrong colour, defective zippers | 2.5 |
| Minor | Cosmetic faults that do not affect fit, function or safety | 4.0 |
Define defects before inspecting
The table is a starting agreement, not permission to classify defects casually. Describe what an inspector should observe and how the fault affects the garment. Include photographic references where appearance matters.
An open seam that compromises wear is a major defect. A cosmetic stitch irregularity may be minor only if the buyer's standard allows that classification. Protective clothing requires particular care because a construction fault can affect safety rather than appearance.
For measurement findings, reference the POM code, inspected size, actual result, and approved tolerance. Don't write “fit issue” when the inspector can record a specific deviation.
A repaired garment can pass a later check without erasing the fact that its original lot failed.
Select samples and preserve the decision
Randomise selection across cartons, sizes, colours, and production times. Inspecting only accessible garments near the carton opening creates a convenient sample, not a defensible one.
Use the agreed sampling tables to determine sample quantity and acceptance and rejection numbers. Don't derive them from a percentage guessed in Excel, and don't interpret the AQL value as the allowable percentage in the inspected sample.
When findings reach the rejection number, hold the lot. Record whether the agreed response is sorting, repair, or reinspection, who authorised it, and which garments or cartons it covers. Keep the original inspection results intact and create a linked follow-up record for subsequent findings.
Make the quality-control process executable through these columns:
- Sampling inputs: Lot size, inspection level, sample-size code, and sample quantity.
- Decision criteria: Defect class, AQL, acceptance number, and rejection number.
- Inspection outcome: Defect findings, inspector disposition, hold status, and follow-up reference.
Before the next order, write the critical, major, and minor defect definitions for that specific garment. Then confirm the sampling settings with the buyer before inspection begins.
When Excel Stops Being Enough
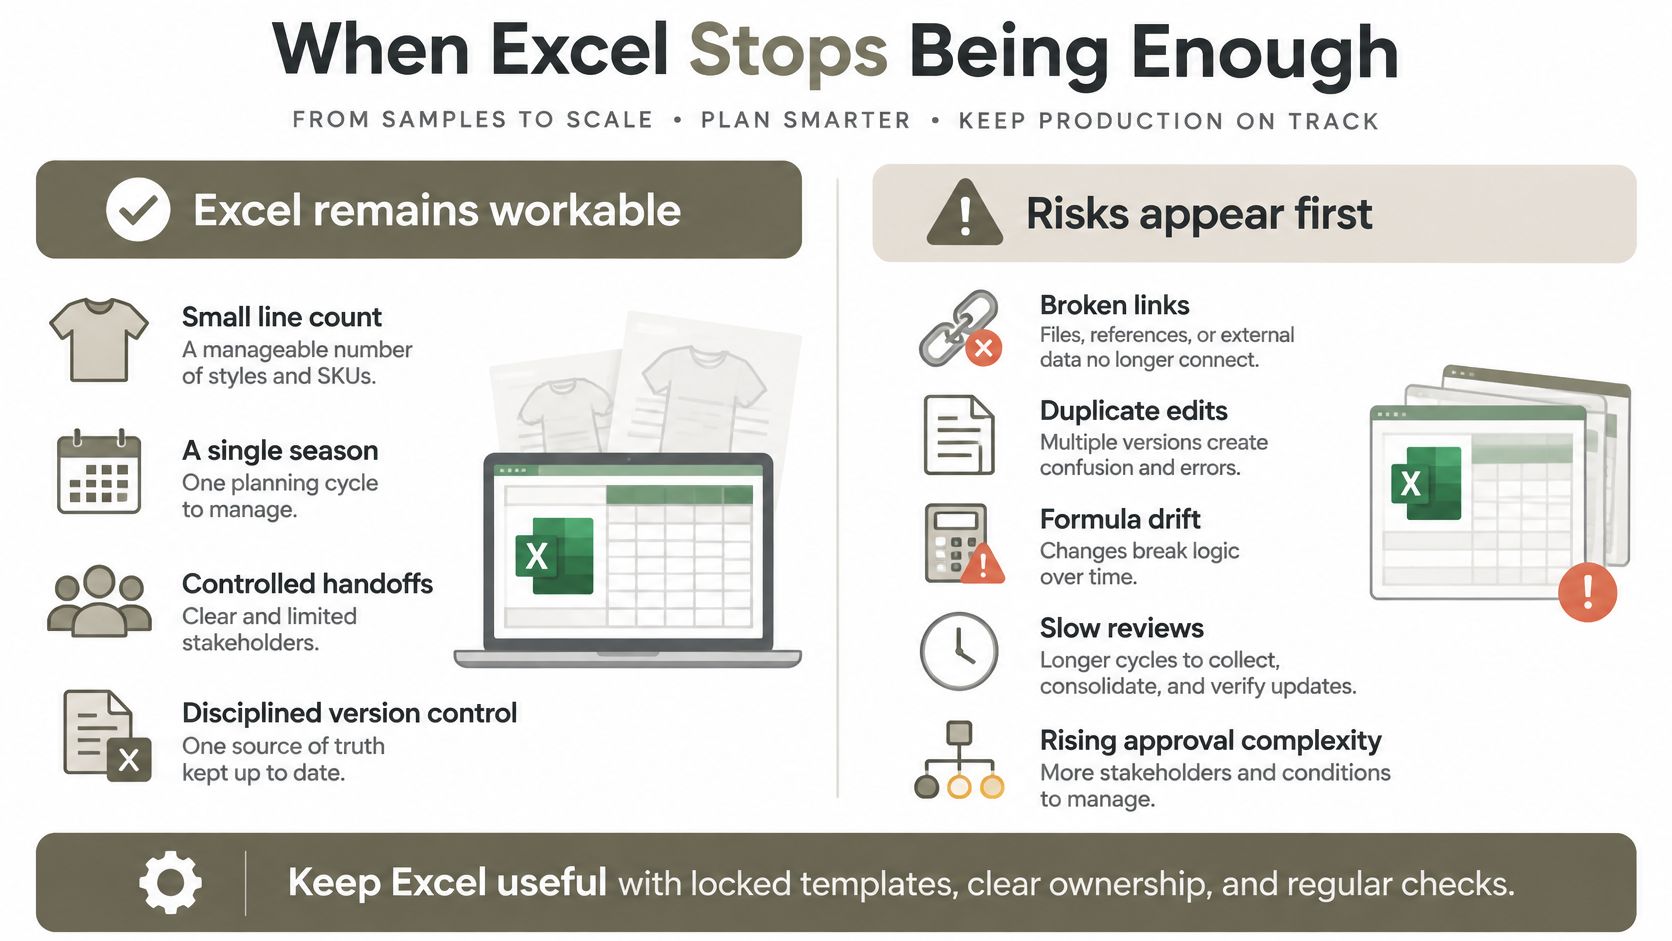
Excel isn't automatically the problem. A brand can send a perfectly readable spreadsheet while losing control of which attachment the factory approved. Replacing the file format won't fix unclear authority or undocumented decisions.
The more useful question is whether the team can prove the release history. Can someone identify the approved revision, its approver, its recipients, and the changes made after the previous release? If answering requires searching personal inboxes, the workflow needs attention.
The CLO-SET guide to production-ready Excel tech packs places a practical breaking point for unmanaged workflows at roughly 10–15 active styles per season. Treat that as an industry estimate, not a universal capacity limit: colourways, approval frequency, measurement complexity, and supplier coordination can make a smaller programme harder to control.
Judge the workload by its failure modes
Decision signals for keeping Excel or moving to a controlled system
| Criterion | Excel usually workable | Move to a controlled system |
|---|---|---|
| Active styles per season | Small programme with a single release owner | Growing programme without enforced version control |
| Revision frequency | Few changes, each logged manually | Frequent changes across several teams |
| Supplier count | One dependable factory | Several suppliers working from the same file |
| Measurement complexity | Few POMs, simple grading | Many POMs, multiple grades and tolerances |
| Audit requirements | Internal record is enough | Buyer or regulator needs proof of the approved revision |
A small line with a dependable factory and infrequent fit updates may remain manageable with protected workbooks and disciplined release logs. A broader collection with simultaneous supplier development and frequent corrections needs stronger controls, even when everyone prefers Excel.
Look for specific symptoms: duplicated measurement entry, formula cells overwritten with fixed values, drawings that shift during export, and factory PDFs missing approval notes. Count the unresolved handoff problems, not just the number of files.
Upgrade the source, not necessarily the factory's format
Many factories accept Excel without difficulty. Keep it as a delivery format if it suits production, while moving authoritative specifications into a system that records approvals, permissions, and release history.
For a broader view of how design tools connect with development and production, Sprello's guide to sketch-to-store workflows provides useful context when mapping the handoffs your team needs to support. Compare systems against those handoffs rather than choosing from a feature list alone.
Review trigger: If the team can't distinguish approved instructions from working edits, stronger version control is already justified.
Score the workbook against each decision row using controlled, manual but reliable, or unresolved. Treat any condition in the right-hand column as a trigger for review, not an automatic purchase order for software. First define who approves changes and what evidence a release must preserve, then choose a system that enforces those rules.
Traceability Fields for Compliance-Ready Records
A material line needs more than composition and colour if someone must substantiate its origin. Add fibre origin, mill name, dyeing inputs, certificate reference, and batch identifier. Include energy, water, and chemical information where the buyer or applicable regulation requires it, with units, reporting boundaries, and supporting documents.
The CBI apparel digitalisation guide connects digital business processes with physical and digital tracing of raw materials back to origin. That's a more useful objective than attaching a certificate and assuming the whole garment is traceable.
Link evidence to the material actually used
Store evidence references against stable material and batch identifiers. A certificate for a supplier doesn't automatically establish that the delivered fabric belongs to the certified scope. Record what the document covers, its applicability, and who reviewed it.
Use a hybrid workflow when factories need spreadsheets. The production export contains the approved instructions; the brand's structured record retains the relationships between specification, supplier, material, batch, certificate, and approval history. Preserve released records so later updates don't rewrite earlier production evidence.
Assign responsibilities explicitly:
- Sourcing owns supplier evidence: Request documents, verify that references match the purchased material, and chase missing records.
- Technical design owns specifications: Confirm that substitutions remain consistent with construction and fit requirements.
- Compliance owns applicable checks: Define evidence requirements and review unresolved exceptions where that role exists.
- The editor logs evidence changes: Record batch or certificate replacements with a date, reason, and approval reference.
Make missing evidence visible
Mark an incomplete line evidence pending, with a due date, responsible person, and reason. Don't fill missing origin or resource fields with estimates just to remove blank cells.
For example, cotton jersey with a mill name and certificate reference but no batch identifier remains pending until the supplier provides the batch record. A document's existence isn't enough if nobody can connect it to the roll issued for cutting.
Use a release hold for unresolved evidence. Close the gap before approving bulk production, or obtain the buyer's written risk acceptance where that acceptance is legally permissible. A commercial approval cannot override a legal requirement.
Choose Your Export Format and Next Step
An accurate workbook still fails if the factory receives clipped tables or unreadable drawings. Treat export as a release check, not a final button click.
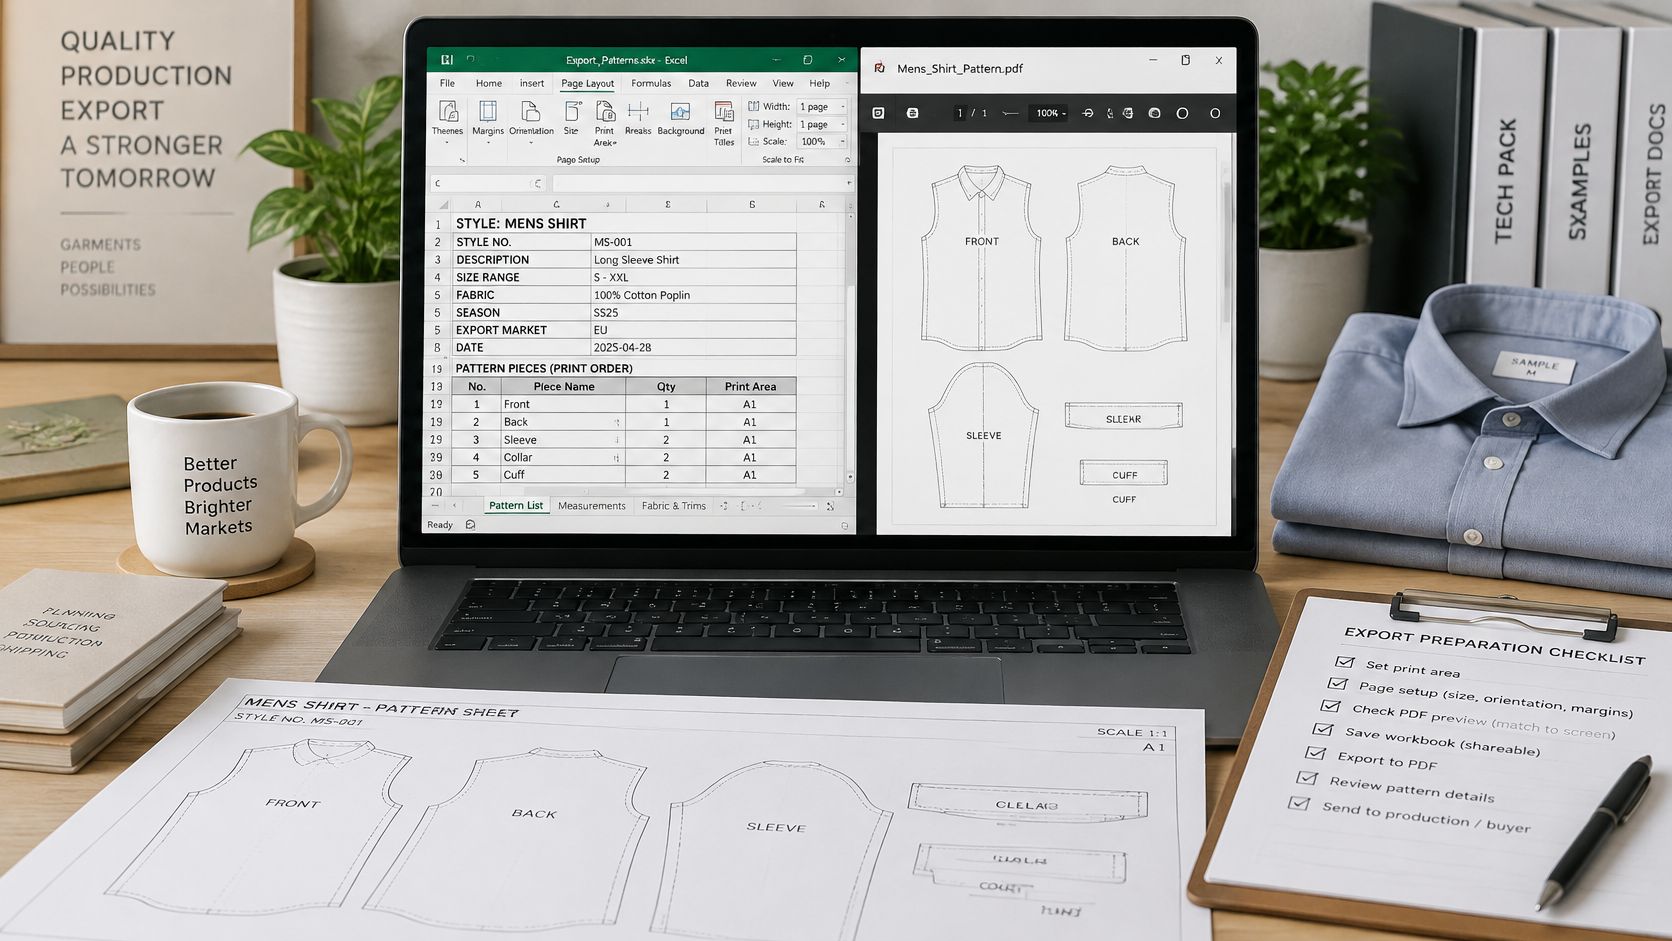
- Set print areas and page setup on each tab. Check scaling and repeat column headers where tables span pages.
- Anchor images to cells and test their placement after row changes. Keep drawing references legible at the exported scale.
- Avoid merged cells and hidden rows in data tabs. Use written status labels rather than colour alone.
- Name releases with the style, season, and revision, using a consistent pattern such as
STYLE-SEASON-revB. - Export a PDF for factory printing and retain the
.xlsxmaster as the editable record. - Open the export on another device. Check page breaks, symbols, images, and the final approval status before sending.
Keep Excel as the master when changes remain manageable. Choose a controlled source system when coordination and approval evidence exceed what the team can reliably maintain manually.
Genpire is one option: we generate factory-ready tech packs from a product idea or uploaded sketch and export designs for web, print, and manufacturing use. Factories comment directly on the same file the designer finished, avoiding handoffs and retranslations.
Fix the recurring gaps in your current file before selecting the workflow for your next order. Software won't resolve an undefined measurement method or an unapproved substitution.
Turn your product idea or uploaded sketch into a factory-ready tech pack with Genpire, then connect with vetted global manufacturers and manage samples and bulk orders. Bring your current specification gaps into that process so measurements, components, and approvals are resolved before production begins.