If you know where a strap ends and a handle begins, do you also know which hidden part stops the strap from tearing out of the bag? Many can name a zipper, a pocket, or a handle, yet the parts of a handbag that decide whether it stands up, carries weight, and survives daily use are often the ones you can't see from the outside.
That's why naming parts isn't enough. A technical designer looks at each component as a job under load, wear, or friction. The gusset creates volume, the lining protects the shell from the inside, the reinforcement plate spreads pulling force, and the closure controls access hundreds of times over a bag's life. When one job isn't done well, a specific failure follows. Learn the job, and you can predict the failure before you ever make a sample.
Table of Contents
- Handbag Parts at a Glance
- A 1910 Handbag Broken Into Its Parts
- How the Shell, Lining and Gusset Build the Bag
- Straps, Handles and the Points That Carry Load
- Closures and Hardware Compared for Everyday Use
- Which Parts Fail First and Can Be Replaced
- Check Every Part Before Your Next Bag Sample
Handbag Parts at a Glance
Start by matching each name to a physical piece you can point to on a structured bag. This table is your reference for the parts of a handbag, whether you're inspecting a tote you own or writing a specification for one you'll make.
| Part | What It Is | Main Job |
|---|---|---|
| Body (shell) | Exterior panels forming the face of the bag | Sets the silhouette and protects contents |
| Lining | Fabric or leather layer sewn inside the body | Hides raw seams, protects the shell, adds pockets |
| Gusset | Strip joining front, back and base | Creates depth so the bag stands up and holds volume |
| Handle | Short carry loop, often leather | Carries the bag by hand or forearm |
| Strap | Longer shoulder or crossbody band | Spreads the load across the body |
| Attachment tab and anchor | Piece that joins the strap or handle to the body | Transfers load into the bag structure |
| Reinforcement plate | Internal plate or extra layer at attachment points | Stops stitches and anchors from tearing through |
| Hardware | Metal D-rings, rings, swivel clips and clasps | Connects, adjusts and closes the bag |
| Closure | Zipper, magnetic snap, turn-lock or flap | Secures the opening |
| Pockets | Internal and external compartments | Organises contents by use |
| Base feet | Small pads on the bottom panel | Keeps the bag off wet or dirty ground |
Five Systems Working Together
Those eleven parts fall into five systems. The shell system (body, lining, gusset, base) builds the shape. The carry system (handle, strap, tab, anchor, reinforcement) moves the weight. The closure system and its hardware control the opening, the organisation system divides the interior, and trim covers everything decorative, from tassels to edge paint.
Grouping parts this way helps you diagnose problems quickly. A bag that slumps has a shell problem, not a closure problem. A bag that's hard to open one-handed has a closure problem, even if its shell is beautifully made.
Quick check: Turn a bag inside out and find three things, the lining seam, the gusset join at the base corner, and the anchor stitching where the handle meets the body. If you can find all three, you can read any bag's construction.
Each system that follows gets its own close look, starting with the shell that gives the bag its form.
A 1910 Handbag Broken Into Its Parts
A single small bag can hold more engineering than you'd expect. The Victoria and Albert Museum handbag from about 1910 lists a rectangular body, a flap fastening, a brass lever catch, a beige plaited-silk carrying handle with two tassels, a snap-fastening change purse, a scalloped pocket, and a lower rectangular slot.
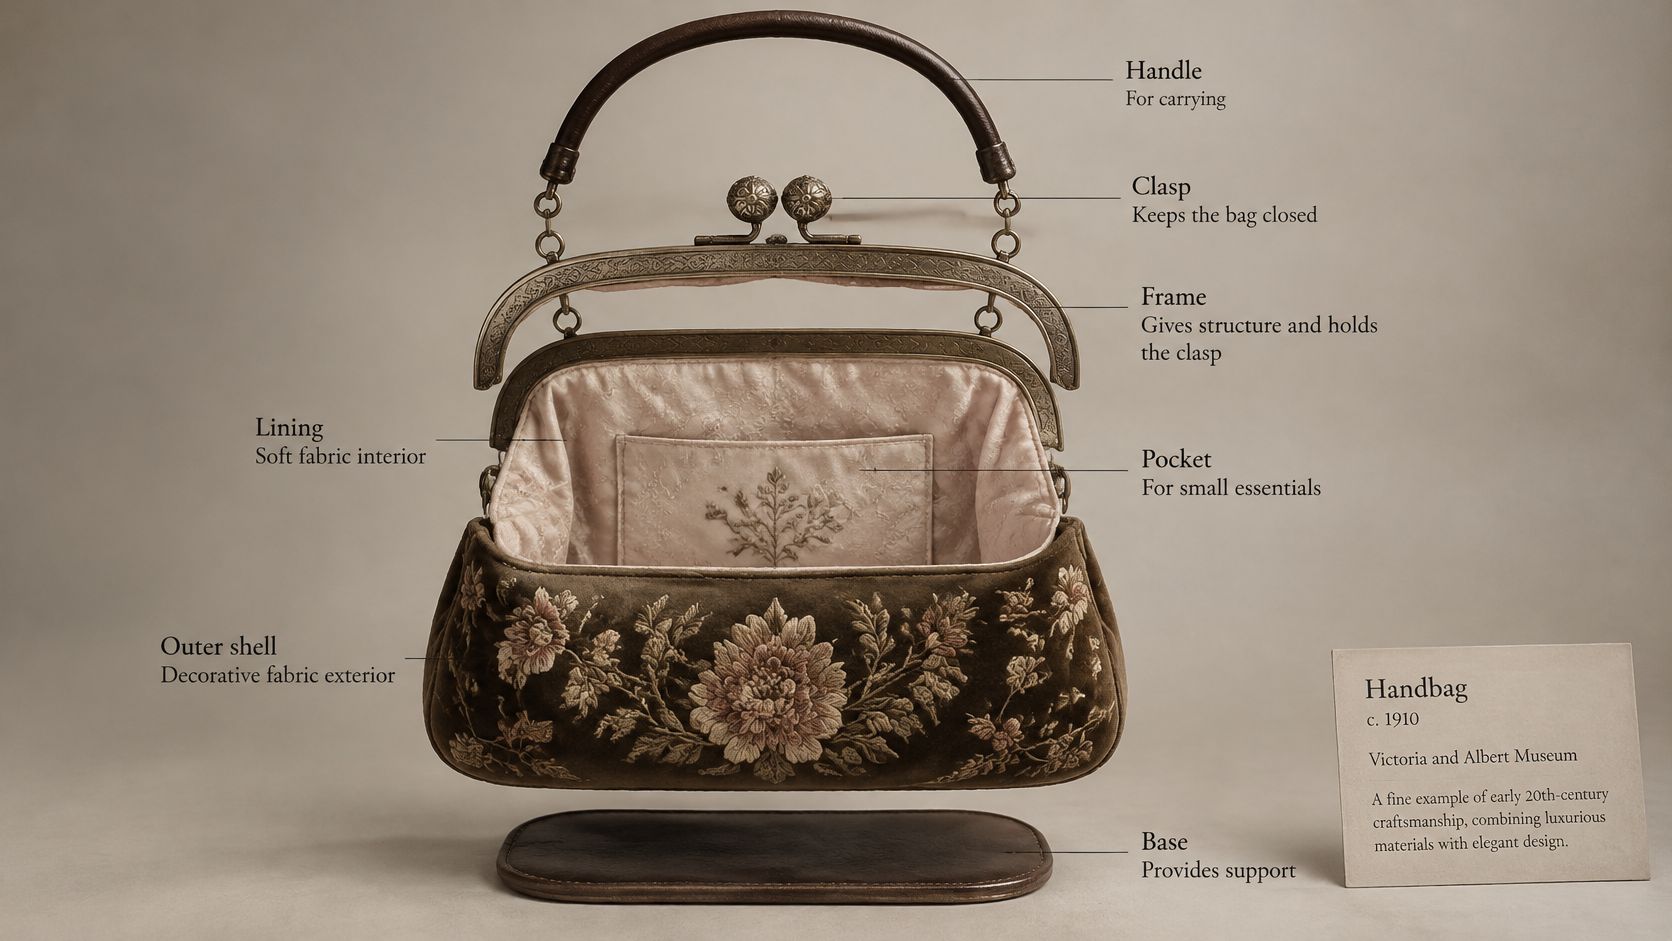
Read it from outside to inside, the way a maker would. The body and flap form the main enclosure, so together they act as the shell. The brass lever catch controls access and absorbs every opening cycle, which is why it is metal while the panel behind it is silk. The plaited handle carries the full weight of the loaded bag between two anchor points, and the plaiting itself matters: several cords share the strain, so wear on one strand does not immediately end the handle. The two tassels hang from it doing no structural work at all. They are trim.
Inside, the snap-fastened change purse separates coins from everything else. Coins are heavy, hard-edged, and dirty, so they earn their own small container rather than rubbing against softer contents. The scalloped pocket and the flat rectangular slot do the same organising job in different shapes, one soft and decorative, one fitted for slim items. Organisation works as a series of small decisions about what should not touch what.
The fitted contents add further items, including a leather-backed mirror, a bone note card, a pencil, telescopic opera glasses, a folding fan, and a powder puff, each with its own place in the bag.
That is the working vocabulary for any modern bag. Body, flap, handle, catch, pocket, trim. The materials have changed across a century. The jobs have stayed the same, and a bag that fails almost always fails at one of them first.
How the Shell, Lining and Gusset Build the Bag
Think of a box made from flat cardboard. Two large panels alone stay flat. Add a connecting strip around the sides and bottom, and the same panels suddenly hold volume. That's exactly what a gusset does between a handbag's front, back, and base.
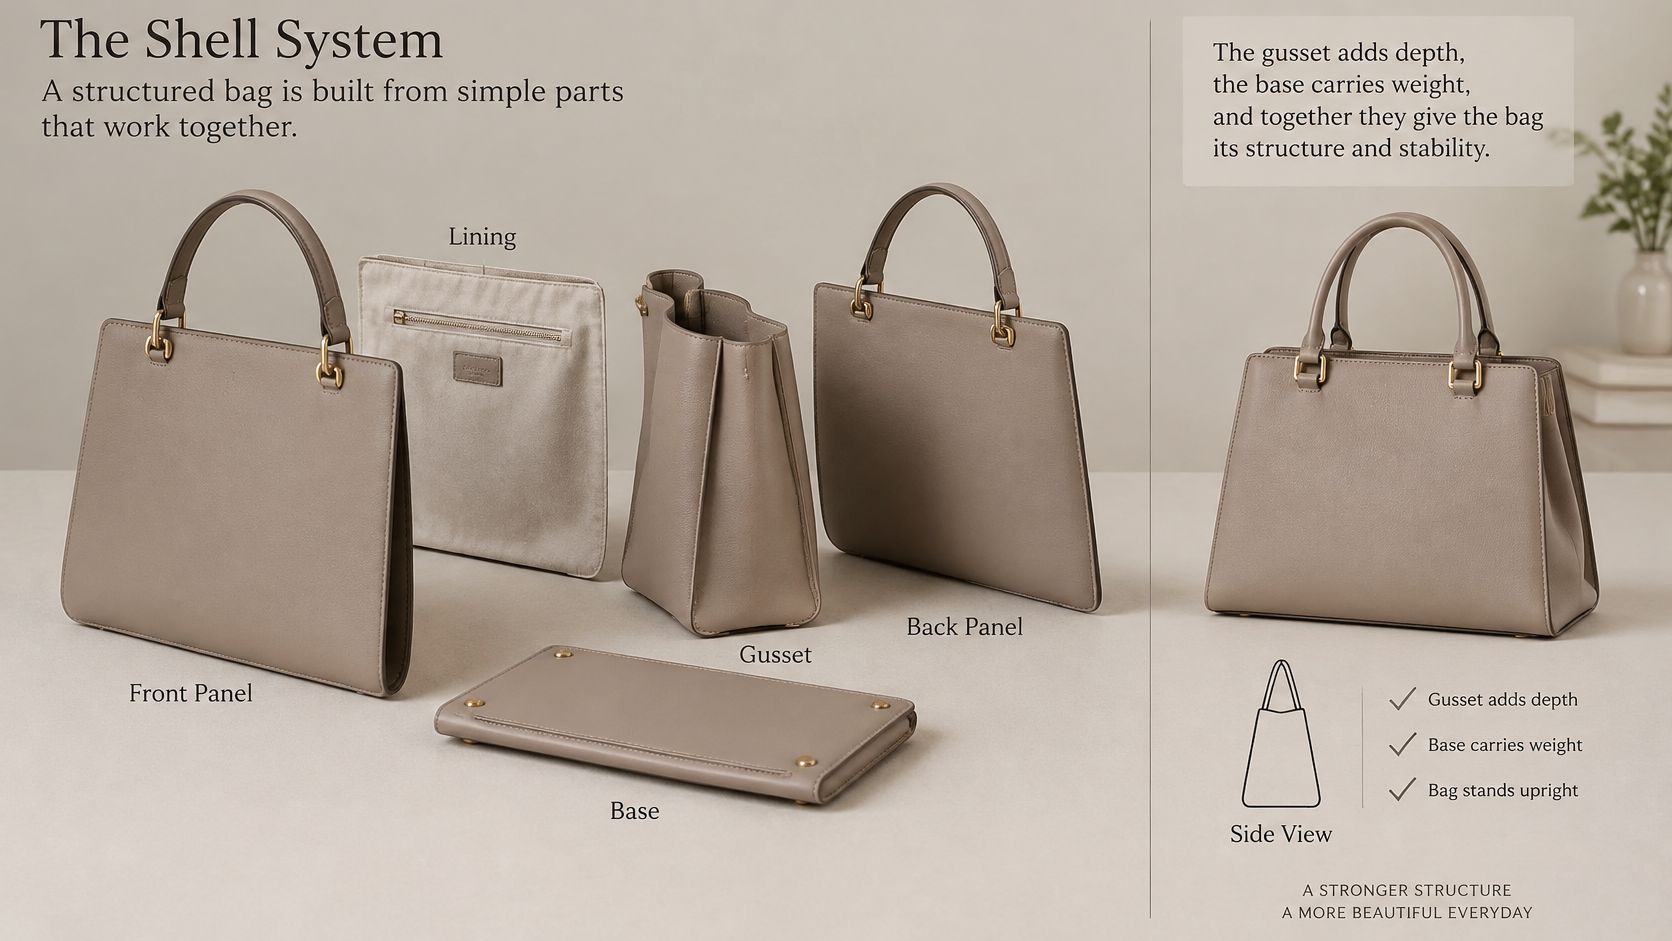
A flat tote skips the gusset, so it hugs your side and holds flat things well. A structured box bag uses a deep gusset, and that depth, measured in centimetres, sets how much it holds and whether it stands upright when you set it down. The base panel bears the downward weight, while the front and back panels set the silhouette you see. Without internal stiffeners, soft shells rely on material thickness alone to keep that shape.
This architecture isn't new. The Museu Nacional Soares dos Reis handbag collection notes trace how exterior panels, a load-transferring handle or strap, an opening system, and interior pockets became the recognisable structure after late nineteenth-century bags absorbed features from men's travelling luggage, including metal fastenings and compartmentalised interiors.
What the Lining Actually Does
The lining isn't decoration. A cotton twill lining is light, cheap, and easy to replace, but it won't protect a shell from keys or pen tips for long. A leather lining protects well and feels premium, yet it adds weight and cost to every panel. Either way, the lining hides raw seams, carries the interior pockets, and takes the abrasion so the shell doesn't.
Material choice compounds that trade-off, which is why it helps to understand leather grades before you specify a shell, such as in this guide to full-grain leather quality explained. When you're preparing a design for a factory, recording each choice clearly matters, and our design for manufacturing guidance covers how those decisions travel into production.
Specifications make shape checkable. Generated tech packs include points of measure, such as sleeve length and shoulder width, in centimetres, and for bags you'll record height, width, and gusset depth the same way. Press an empty bag on its sides. Where it holds, the shell system is working. Where it collapses, you've found a missing stiffener or a gusset that's too soft for its width.
Straps, Handles and the Points That Carry Load
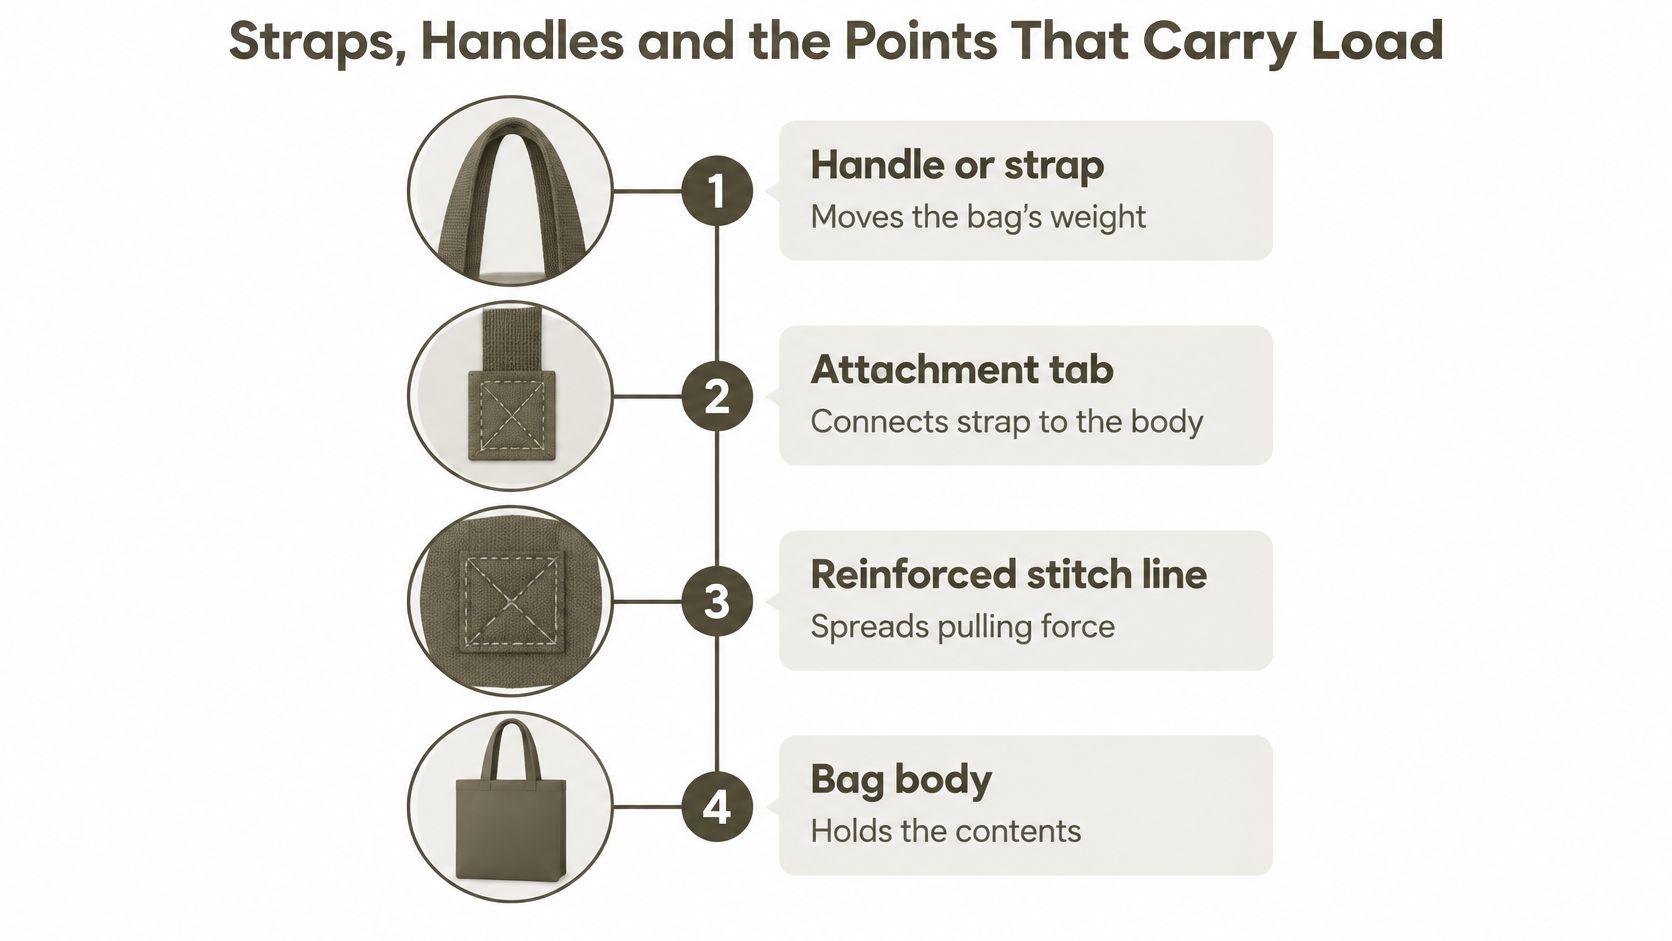
Follow the weight. It starts in the base, rises through the body panel, passes into the anchor, crosses the attachment tab, and only then reaches the handle in your hand. The handle is the last link, not the first, which is why a strong-looking handle can still tear free from a weak bag.
A leather handle should use firm, low-stretch leather, cut along the hide's least-extensible direction. The craftsman folds, skives, and stitches the layers so they act as one structural member. Cut it across the stretch direction instead, and the handle elongates a little every time you lift a full bag. Within months, the drop length changes and the stitches start carrying load they weren't meant to carry alone.
Where the Chain Breaks
At each attachment point, a reinforcement plate, extra leather layer, or strip inside the body spreads force over a wider area. Skip it, and concentrated stress produces three predictable failures, stitch rupture, leather elongation, or hardware pull-through straight through the panel.
Testing has to follow the same chain. Intertek's leather goods testing identifies strap-fastening strength, seam strength, abrasion resistance, and flex resistance as relevant checks, and it notes that testing should isolate the complete attachment rather than the strap material alone. Calibrated pull testing commonly runs handle or strap checks around 15 to 20 kg of applied force.
The weakest component is usually the attachment interface, not the visible handle itself. Inspect the interface first.
For designers, that means your specification needs the tab dimensions, reinforcement geometry, and stitch density, not just a strap width. Our guide to spec sheet essentials for fashion designers shows how to record those figures so a factory can't improvise them. The full pre-sample figures are gathered in the final checklist.
Closures and Hardware Compared for Everyday Use
Security and speed pull in opposite directions. The table below compares the closures you'll meet most often, plus the hardware that connects them to the body, such as D-rings, swivel clips, and base feet.
| Closure | Security | Access Speed | Best Fit |
|---|---|---|---|
| Zipper | High when fully closed | Slower, often needs two hands | Totes and work bags carrying valuables |
| Magnetic snap | Medium, opens with light force | Fast, one hand | Evening bags and daily pouches |
| Turn-lock | Medium to high, depends on the lock | Fast once aligned | Structured bags with a flap |
| Flap with buckle or strap | Medium | Moderate | Satchels and messenger bags |
| Drawstring | Low to medium | Fast but the opening stays loose | Soft pouches and historical reticules |
| Frame clasp | Medium to high | Moderate, needs both hands | Structured or vintage-style bags |
The Accessibility Test the Table Can't Show
A closure that works on a shop counter can fail in real life. Research on inclusive apparel in the International Journal of Fashion Design, Technology and Education proposes evaluating products by capability levels of minimal, moderate, or severe difficulty, and earlier disability-focused work found that armrest-mounted designs improve access while large zipper pulls, magnetic closures, expandable construction, and compartments improve usability for wheelchair users.
That research points to four checks you can run on any sample:
- Opening force: Can you open it while gripping something else in the same hand?
- Pull-tab size: Can a thumb and one finger with limited strength catch and hold it?
- Closure alignment: Does a turn-lock or snap find its mate without visual aiming?
- Mounted use: Does the opening stay reachable when the bag hangs on a chair armrest?
A magnetic snap wins the first test and loses on security. A zipper with an oversized pull can pass all four if the bag's mouth stays open on its own. There's no universally best closure, only the best match for one user's hands.
Choose by two questions. How often will this bag open each day, and how much hand strength can you count on? Frequent opening with limited strength points to magnets or large pulls. Infrequent opening with valuables inside points to a zipper.
Which Parts Fail First and Can Be Replaced
A tough leather body doesn't make a bag repairable. That's the assumption worth challenging, because the parts of a handbag that fail first are rarely the big panels. They're the small, high-interaction pieces you touch every day, zipper sliders, magnetic closures, turn-locks, D-rings, handle anchors, and base feet.
Repair is becoming a real business, not a hobby. The Reselfridges Report 2025 reported that repair generated 12% of its circular revenue in 2025 and grew 10% year over year across ready-to-wear, handbags, and shoes.
Serviceability Is Not the Same as Material Choice
Material sustainability asks what a bag is made of. Serviceability asks whether a worn part can come off and a new one can go on. A durable shell doesn't help if the closure can't be swapped or the strap is permanently trapped inside stitched construction. The bag dies with its cheapest component.
Five construction choices decide whether repair is economical:
- Modular attachment: Clipped or screwed parts come off, stitched-in parts often don't.
- Accessible stitch lines: A repairer can open and restitch a seam that isn't glued shut.
- Replaceable hardware standards: Common slider and ring sizes mean spares exist.
- Lining access: An opening in the lining lets a repairer reach anchors and plates.
- Spare-part availability: A part nobody stocks can't be replaced at any price.
Run three checks on a bag you own. Can the strap unclip? Can the zipper slider slide off for replacement? Can you reach the lining's inside without cutting? Three yes answers mean most failures are fixable. Premium appearance and repairability don't conflict when the specification records replacement parts, attachment methods, and expected wear points from the start, details most consumer guides leave out entirely.
Check Every Part Before Your Next Bag Sample
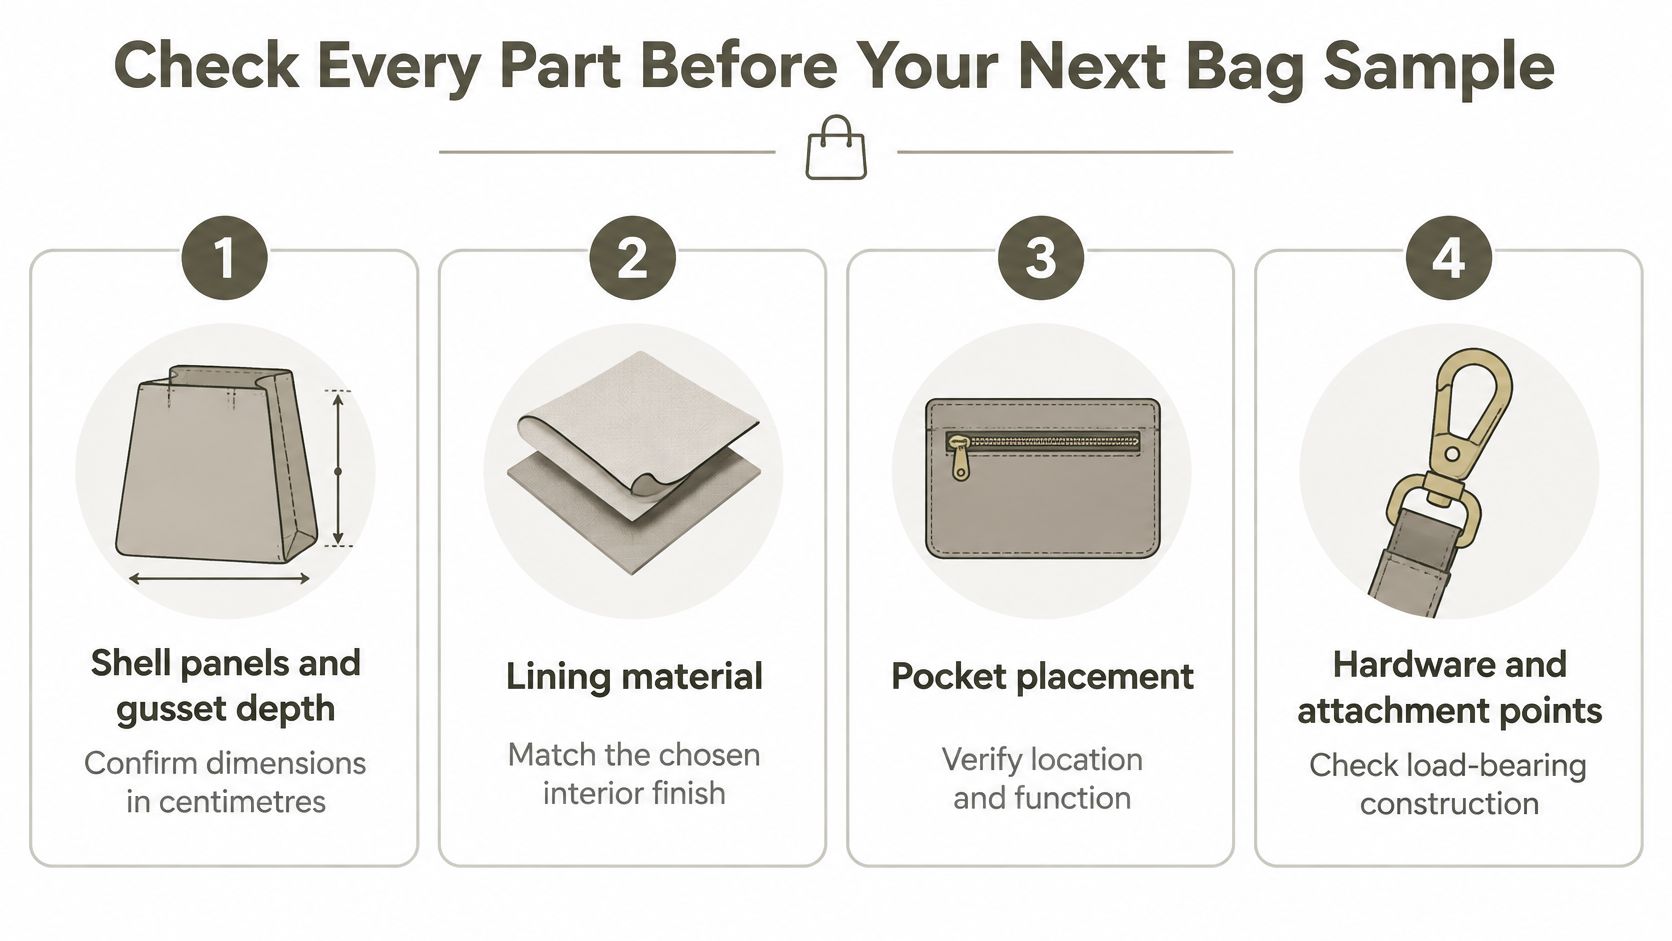
Turn the vocabulary into a specification with these seven checks before you order a sample:
- Shell and gusset: Panel material and gusset depth, with points of measure in centimetres.
- Lining: Material, pocket layout, seam finish, and repair access opening.
- Handle or strap: Cross-section, leather thickness, and cutting direction along the hide.
- Reinforcement: Plate geometry, stitch density, and anchor size at every attachment.
- Hardware: Material, finish, and a minimum pull-force figure for load-bearing pieces.
- Closure: Type, opening force, and pull-tab size tested with one hand.
- Replaceable parts: Sliders, feet, and straps marked as replaceable or permanent.
A complete tech pack for a prototype order includes drawings, dimensions, BOM, and construction notes, and construction details cover seams, stitching, closures and linings while component details cover trims, hardware, labels, zippers and buttons. Each product category also has tech pack templates with category-specific specs, such as karat weights for jewelry, ASTM testing for footwear, and CPSIA compliance for toys. Our guide to the tech pack maker for bags, jewellery and footwear explains how those templates apply to bags.
Write the spec for one bag, send it for a sample, then check every part against this list before you approve production.
Turn your handbag idea into a factory-ready specification with Genpire, from multi-view concepts to tech packs that call out every panel, gusset, strap anchor, and hardware piece your sample maker needs. Visit Genpire to build your first bag spec, check it against the list above, and send it to sampling with confidence.