You've got a sunglasses concept that looks convincing on screen. The front view is balanced, the colorway is approved, and the render is ready for a presentation. Then the factory asks for lens geometry, bridge dimensions, hinge placement, temple curvature, tolerances, and material constraints. Suddenly, the “finished” design is only a starting point.
A reliable template for sunglasses solves that handoff before sampling begins. It turns a visual idea into a controlled production system, with dimensions, views, construction details, and variant rules that a sample maker can interpret without guessing. That distinction matters in a category valued at USD 43.03 billion in 2025, with a projected value of USD 111.61 billion by 2033, according to Grand View Research's sunglasses market analysis. A reusable template gives a brand a way to respond to that demand without rebuilding its technical foundation for every new frame.
Table of Contents
- What a Sunglasses Template Actually Is and Why Factories Care
- Core Measurements Every Sunglasses Template Must Encode
- Multi-View Outlines and the Components Inside Them
- Organizing the Template Into a Factory-Ready Tech Pack
- Turning a Blank Template Into Production Specs With an AI Workflow
- Handoff, Tolerance Checks, and the Defects a Good Template Prevents
- Building Sunglasses Templates as a Repeatable Brand System
What a Sunglasses Template Actually Is and Why Factories Care
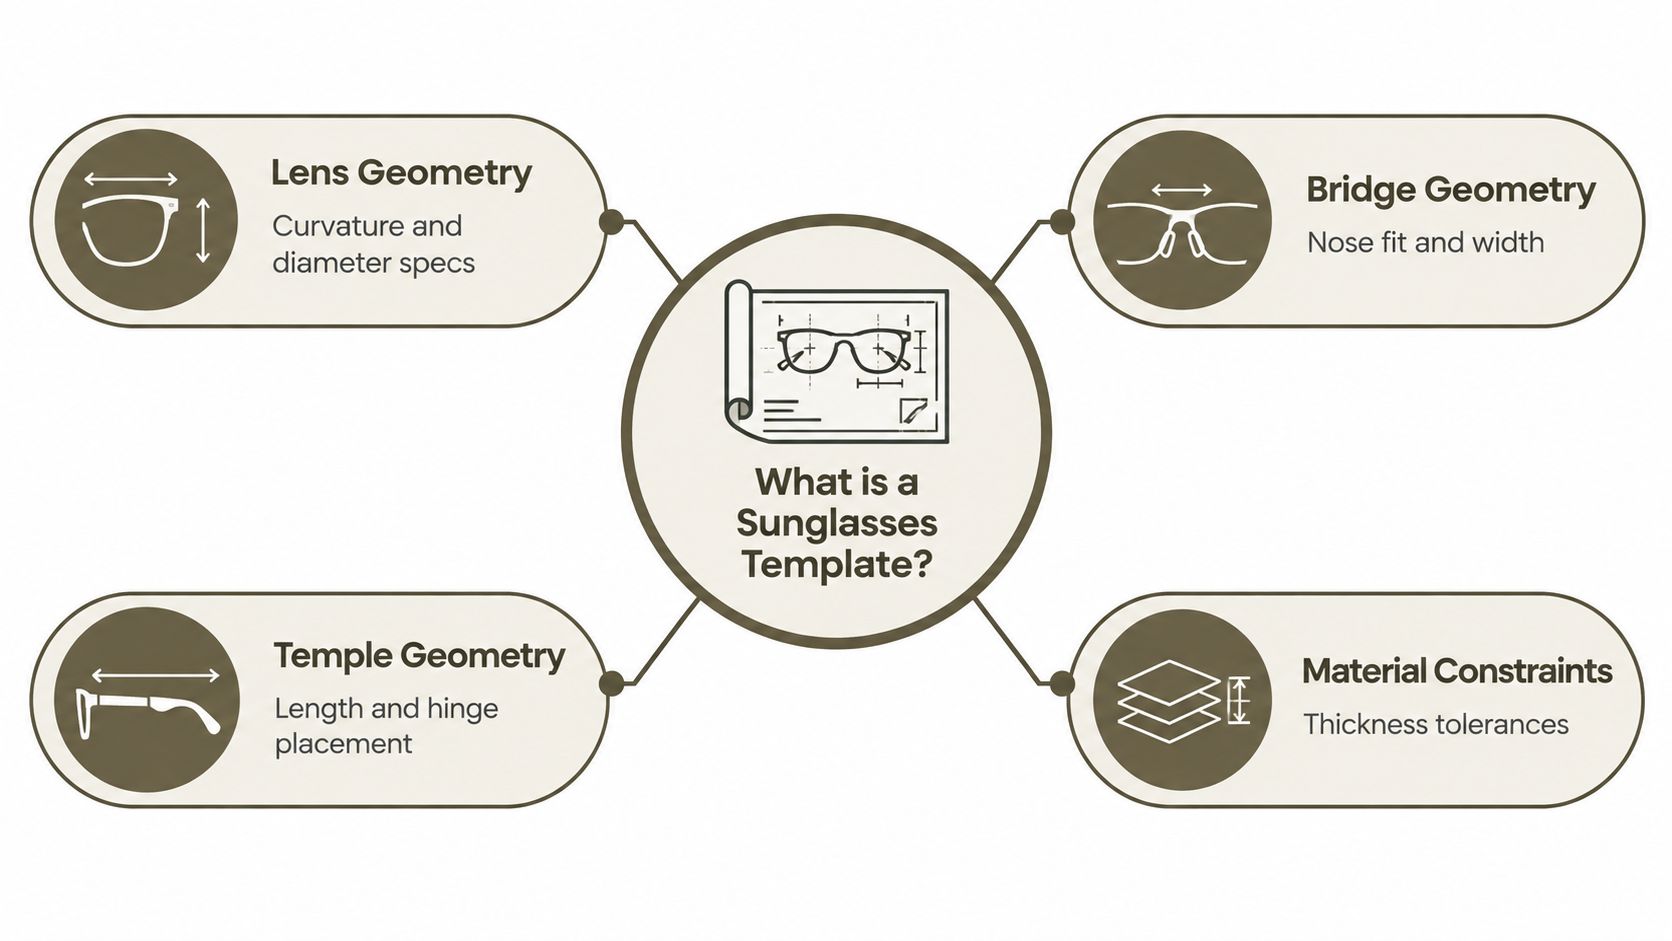
A sunglasses template isn't a marketing render, a moodboard, or a front-view line drawing. It's a scaled, dimensioned vector file that defines lens geometry, bridge geometry, temple geometry, and the relationships between those parts in units a factory can measure.
The file should give a sample maker enough information to compare the drawing against a CAD model, a sizing board, and a physical sample. That means front, side, and top views, plus construction lines, centerlines, and datum references. It also means separating the neutral silhouette from details such as hinges, end pieces, grooves, inlays, and branding.
Start with the geometry, not the decoration
A practical production template begins with a master coordinate system. Establish the frame centerline, optical centers, hinge axis, and key horizontal and vertical datums before styling the outline. Lock those references so later changes to the brow, rim, or temple don't move the measurements that control fit.
The template should then distinguish between:
- Lens geometry, including aperture shape, optical center, edge thickness assumptions, and lens-seat relationships.
- Bridge geometry, including width, height, nose contact, and connection to the lens rims.
- Temple geometry, including length, sweep, drop, hinge position, and end-tip construction.
- Material constraints, including thickness, flex zones, finish limits, and areas affected by molding or machining.
Practical rule: If a factory can't identify what is fixed, what is editable, and what is measured, the file is still a concept document.
A clear tech pack structure carries this logic beyond the drawing. It connects the template to materials, construction notes, tolerances, and approval records. Without that connection, the designer hands over a guess and absorbs the consequences through altered tooling, remade samples, and delayed decisions.
Core Measurements Every Sunglasses Template Must Encode
A frame can match the sketch and still fail on a face. The template must connect each fit dimension to a clear datum, with reference lines that survive revisions to the rim, bridge, or temple.
The working set includes lens width, bridge width, temple length, hinge-to-hinge span, and pantoscopic tilt. A useful starting envelope is 40 to 60 mm for lens width, 14 to 24 mm for bridge width, and 120 to 150 mm for temple length, based on LumiShade's frame geometry guidance. Treat those values as an initial sizing reference, not a finished fit decision. Target-market testing still determines the final geometry.
Build tolerances into the drawing
A nominal dimension describes the target sample. A tolerance defines the acceptable production band. Put both in the template. Linear dimensions need allowable limits, while tilt and temple sweep require angular limits.
| Measurement | Typical range | Tolerance | What it controls |
|---|---|---|---|
| Lens width | 48 to 58 mm | ±0.5 mm | Lens coverage and visual proportion |
| Bridge width | 14 to 22 mm | ±0.5 mm | Nose fit and lens separation |
| Temple length | 135 to 150 mm | ±0.5 mm | Ear pressure and behind-ear placement |
| Hinge-to-hinge span | 130 to 145 mm | ±0.5 mm | Overall frame width |
| Pantoscopic tilt | 8° to 14° | ±1° | Lens angle and coverage |
These ranges and tolerances come from the supplied design brief. Use them as a working reference, then compare the complete frame against the intended fit. A bridge can fall within range and still pinch when paired with a narrow front. A wider bridge can cause sliding if the temples do not provide enough lateral control.
Read the interaction between dimensions
Lens width affects lens edge position, front width, and the relationship between the optical center and the wearer's pupils. Bridge width controls lens separation and nose contact. Temple length sets the behind-ear position, while hinge-to-hinge span determines whether the front compresses the face before the temples engage.
Pantoscopic tilt needs its own inspection because it changes lens position relative to the face. Check it against coverage, brow clearance, and optical alignment. For prescription-compatible designs, mark the optical center as a controlled datum and keep it tied to the lens geometry through every revision.
Organize these measurements with materials, construction notes, and approval fields using the spec-sheet essentials for fashion designers. Keeping those items in one controlled specification set reduces version drift between the drawing, sample comments, and factory revision. A template that records only dimensions leaves the manufacturer to infer how those dimensions should interact.
Multi-View Outlines and the Components Inside Them
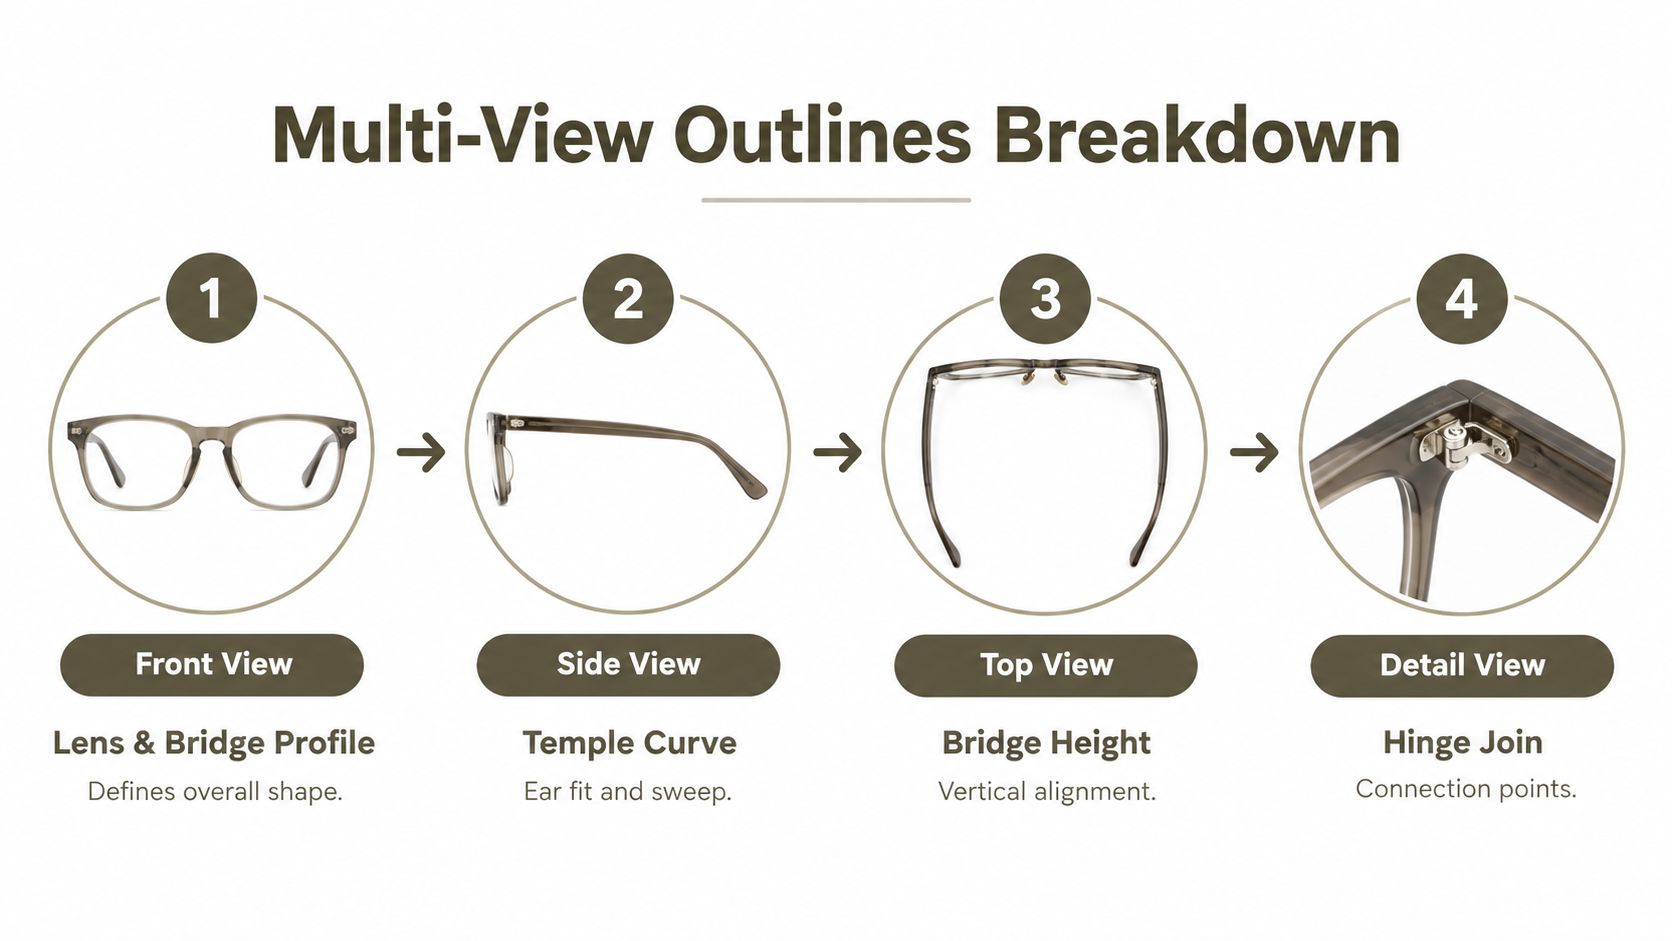
Factories don't manufacture a front view. They manufacture a three-dimensional object whose surfaces must agree across multiple views. A production-grade sunglasses template therefore carries front, side, top, and temple detail views, with each view answering a different manufacturing question.
What each view contributes
The front view defines the visible identity of the frame. It carries the lens aperture, brow line, bridge contour, endpiece angle, rim thickness, and symmetry references. Sample makers use it to check whether the frame front matches the intended silhouette and whether both sides resolve consistently around the centerline.
The side view exposes the features a front drawing hides. It shows pantoscopic tilt, lens curve depth, rim projection, bridge height, temple drop, and the relationship between the front and the ear. A side outline that's missing or vague leaves the factory to infer how aggressively the frame wraps or where the temple should begin to fall.
The top view establishes plan geometry. It controls front wrap, base curve alignment, lens plane, and the distance between the frame front and the temples. This view is especially important for thick or wrapped sunglasses, where a flat front can make the drawing appear correct while the physical frame creates pressure at the sides of the head.
The temple detail view zooms in on hinge construction, end tips, branding, inlays, and transitions between materials. It should show the hinge axis and the parts that must survive repeated opening and closing.
Use consistent layers in every view
Keep the layer order consistent across the file:
- Outline layer for visible frame and component edges.
- Construction layer for centerlines, axes, datums, and alignment references.
- Dimension layer for nominal values and tolerance callouts.
- Hidden layer for grooves, internal interfaces, and covered hardware.
View order isn't an aesthetic choice. It mirrors the sequence a sample maker follows when comparing a drawing with a CAD model and a physical part. If the front view says one thing and the top view implies another, the supplier has to choose which interpretation to trust.
Organizing the Template Into a Factory-Ready Tech Pack
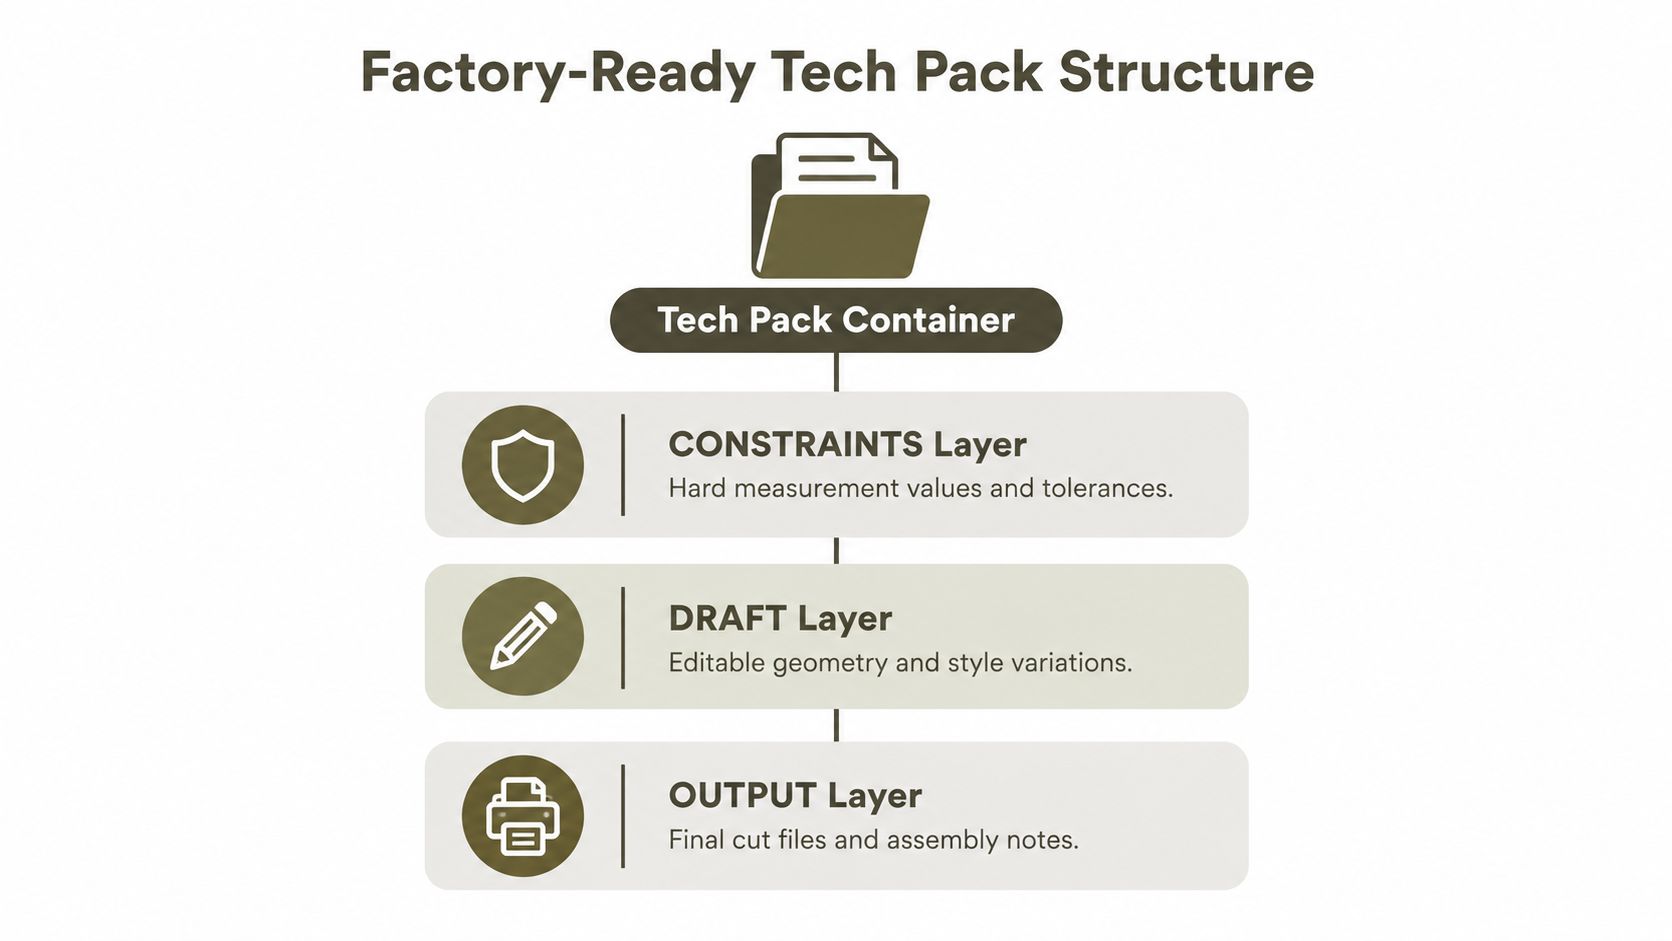
A template becomes useful when its layers map directly to the pages and fields a factory needs. The cleanest setup separates hard constraints from editable styling and finished output.
Create a layer system that survives revisions
Start with a CONSTRAINTS layer. Put the centerline, optical centers, hinge axis, key dimensions, material limits, and tolerance bands here. Lock it before styling begins. This layer should be difficult to edit accidentally because it carries the production logic of the model.
The DRAFT layer contains the neutral silhouette and editable style variations. Designers can test a wayfarer brow, an aviator lens, or a cat-eye endpiece without touching the underlying datums. Keep construction geometry separate from the styling curves so an approved measurement remains stable while the outline evolves.
Use a DETAIL layer for hinge construction, lens grooves, end-piece transitions, hardware, branding, and inlay geometry. A NOTES layer should hold material callouts, assembly directions, finish requirements, and any area where the drawing needs a written explanation.
Pair the geometry with structured pages
A practical tech pack should include:
- Cover sheet: Style number, revision, designer, supplier, and approval status.
- Materials and BOM page: Acetate color, lens type, hinge code, hardware, and finish.
- Measurement sheet: Nominal dimensions, tolerance bands, and inspection method.
- Construction pages: Front, side, top, and detail views with matching references.
- Branding and packaging page: Logo placement, marking method, case, cloth, and carton notes.
Layer names and color coding matter because suppliers often work across different software and teams. Locked construction lines should print or export differently from editable geometry, and every page should identify the same style number and revision.
The supplied workflow notes call for explicit tolerance fields rather than vague labels. Don't write “standard fit” beside the frame. Write the target dimension, allowable variation, datum, and inspection method. That change turns a subjective review into a repeatable check.
Turning a Blank Template Into Production Specs With an AI Workflow
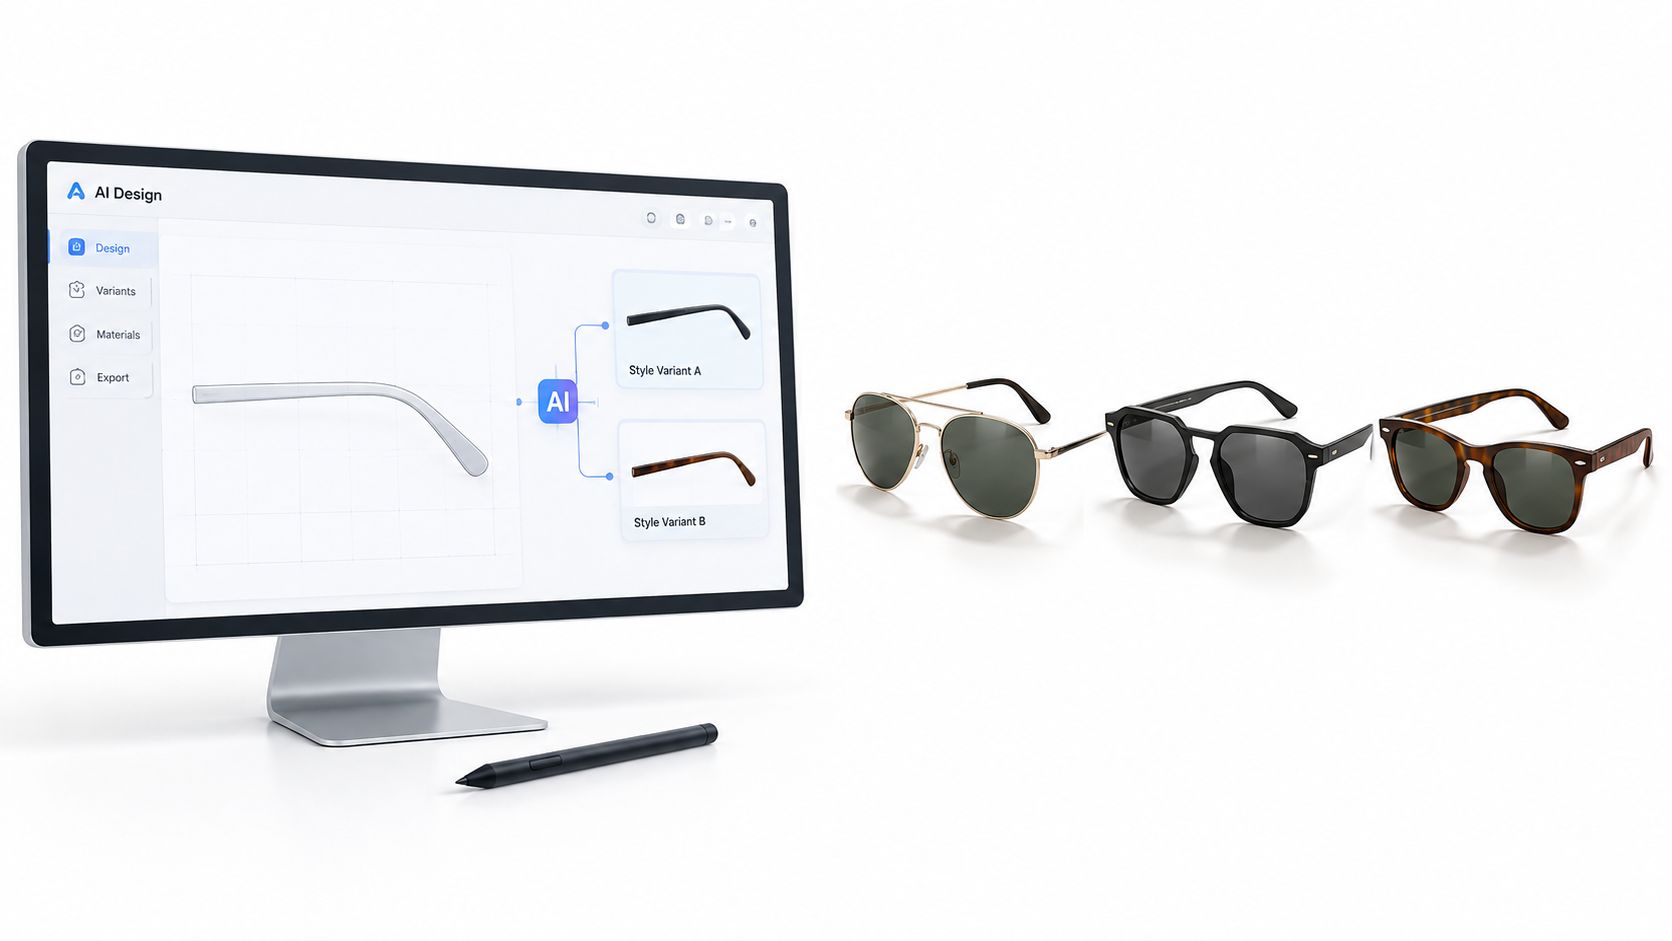
AI is most useful here after the template backbone is defined. It shouldn't be asked to invent production constraints from a blank canvas. Give it a locked master file, clear reference images, and a prompt that states the intended silhouette and measurement targets.
Keep the geometry anchored
A dependable workflow looks like this:
- Upload the master template with the CONSTRAINTS layer locked.
- Add front and side references, material direction, and target market notes.
- Prompt for a defined concept, such as a full-frame acetate aviator or a non-metal cat-eye with a specified bridge and temple target.
- Generate front, side, top, and detail views inside the existing measurement grid.
- Review the lens, frame front, temple, and hinge as separate components.
- Export the approved result as SVG for the technical file, PDF for sample approval, and structured fields for BOM or spreadsheet handoff.
Genpire is one example of an AI-driven workspace that supports prompt-based product creation, multi-view technical concepts, an editable design environment, an agentic tech-pack workspace, and SVG, PDF, and Excel exports. The important control isn't the prompt itself. It's the rule that generated styling must inherit the locked geometry rather than changing it without notice.
This approach works well for variant development. A brand can retain the same measurement grid while testing lens tints, brow proportions, temple branding, hardware finishes, or material combinations. It doesn't remove the need for a human technical review. Generated curves still need inspection for continuity, minimum thickness, hinge clearance, lens seating, and manufacturability.
Review the output as a technical designer
Use the AI output as an editable starting point, not as a gold sample. Check that every view agrees, that the hinge axis lands in the same location across views, and that the lens aperture leaves enough material for the chosen construction. Confirm that notes have been converted into actual fields rather than left as descriptive prose.
The process becomes valuable when it reduces repetitive redrawing while preserving the constraints that make a design buildable. A template for sunglasses should accelerate controlled iteration, not accelerate ambiguity.
The following video can help teams understand how a digital design workflow may fit into a broader product-development process:
Handoff, Tolerance Checks, and the Defects a Good Template Prevents
A factory handoff should produce one clear source of truth. Issue a single tech-pack PDF, linked SVG files, a measurement sheet with nominal and tolerance values, and an approval record tied to the same revision. Keep supplier comments in the shared project workspace, so production decisions do not disappear across separate email threads.
A practical handoff also separates design intent from inspection instructions. The factory needs to know which dimensions control fit, which surfaces affect assembly, and which defects require rejection or correction. A design-for-manufacturing workflow makes those requirements part of the file structure before sampling begins.
Trace each defect back to its missing control
Many failures start with an absent field rather than a poor factory process. A lens can pop out when effective diameter and groove geometry were never specified together. A temple can sit unevenly when the horizontal alignment page is missing or the hinge reference changes between views. A hinge may loosen or fatigue when pin diameter, barrel length, material, or assembly pressure has no defined value.
Neutral eyewear manufacturing defect guidance identifies related fit and alignment risks. A poorly positioned bridge or overly narrow frame can reduce peripheral field of view by up to 18%. For extended wear, the guidance recommends keeping temple force at the mastoid process at or below 1.8 N. It also recommends pupil centers within 1 mm of the lens optical center, with deviations above 1.5 mm typically requiring remounting. Front tilt above 3° may contribute to cylinder-axis distortion in prescription sunwear.
Run a repeatable sample review
Before approving the gold sample, inspect it against the same tolerance script each time:
- Frame front: Check overall width, symmetry, bridge position, lens aperture, and rim continuity.
- Optical alignment: Confirm pupil reference, lens seating, groove engagement, and optical-center relationship.
- Side profile: Verify tilt, wrap, temple drop, and clearance around the face and ears.
- Hardware: Inspect hinge axis, opening resistance, pin placement, and visible gaps.
- Wear test: Check sliding, pinch points, nose pressure, temple pressure, and comfort during sustained use.
- Finish: Review edge polish, coating consistency, logo placement, and material transitions.
Photographs cannot reveal every production problem. A frame may look correct while the lens is under stress or the temples compress the wearer's head. Record measured results, rejected conditions, and corrective actions beside the relevant drawing or inspection field. That record gives the next sample a clear pass criteria instead of another subjective visual review.
Building Sunglasses Templates as a Repeatable Brand System
The strongest brands don't treat each sunglasses file as a one-off. They build a living template library with locked master geometry and controlled variant layers.
The master system should preserve frame-shape families, hinge options, lens-curvature options, measurement bands, material rules, and BOM fields. Variant layers can then change lens tint, hardware finish, temple-tip material, branding, and colorway without redrawing the front, re-establishing datums, or rewriting factory notes.
That structure also supports market adaptation. A global category requires more than one universal fit assumption. The sunglasses market had North America at 31.60% of global revenue in 2025, according to Grand View Research, while full-frame designs represented 53.09% and non-metal sunglasses captured approximately 74.60% of global revenue in that same report. Those figures support a practical starting point for prioritizing full-frame, non-metal template options, but physical validation still decides whether a specific frame works for a target audience.
Use this checklist before archiving a master:
- Master measurements locked: Datums, optical centers, and tolerance bands are protected.
- Variant layers named: Lens, material, hardware, branding, and colorway changes are separated.
- Tech-pack fields populated: BOM, construction, inspection, and packaging data are complete.
- Factory tested: The first production run has been reviewed against the same template.
- Template archived: The approved version is available for the next product family.
A production template earns its value when the next model starts with controlled inheritance instead of a blank page.
Genpire turns sketches, references, and prompts into multi-view product concepts, technical specifications, and manufacturing assets, including structured exports for sunglasses workflows. Visit Genpire to build a reusable template system that keeps fit constraints, tech-pack details, and factory handoff connected.