A sample comes back from the factory and it looks almost right. The silhouette matches. The fabric is correct. Then you turn the garment inside out and see the problem. The side seam was finished with the wrong method, the topstitching looks heavier than expected, and the pocket opening sits a little flatter because the reinforcement wasn't built the way you imagined.
That usually doesn't happen because the factory ignored the design. It happens because the factory had to interpret it.
Junior designers often think construction notes are a small add-on to the sketch. Factories don't see them that way. To a production team, construction details are the working instructions that tell operators what to sew, how to sew it, in what order, and how closely the result needs to match the approved intent. If those instructions are loose, the sample room fills the gaps on its own.
The question behind what are construction details is really this: what information does a factory need so it doesn't have to guess? Once you understand that, your tech packs get sharper, your comments get shorter, and your samples come back closer to first intent.
Table of Contents
- Introduction Why Vague Construction Notes Cost Time and Samples
- What Construction Details Mean Inside a Tech Pack
- Core Elements Every Construction Detail Should Cover
- Why Clear Construction Details Prevent Rework and Delays
- Construction Terminology Across Product Categories
- Examples That Show Factory Ready Construction Details
- Building Better Tech Packs With Complete Construction Details
Introduction Why Vague Construction Notes Cost Time and Samples
A first sample arrives looking close enough on the hanger. Then the team checks the inside. The seam finish is different from what design expected, the topstitch reads heavier, and the pocket opening sits flatter because the reinforcement was built a different way. Nothing is technically "wrong." The factory followed a note that left too much room for interpretation.
That is what vague construction language does. It turns production into a guessing exercise.
A note like "finish side seams neatly" may sound clear during a review meeting, but a sample room cannot sew from adjectives. "Neatly" does not name a seam finish. "Standard topstitch" does not tell an operator which stitch type, width, thread, or SPI to use. Each factory fills that gap with its own habits, machinery, and category defaults.
The confusion usually starts when a designer records the visual idea but not the build instruction. Those are connected, but they serve different readers. A sketch tells the factory what the garment should resemble. Construction notes tell the factory how to make that result repeatable, and they also give a digital team enough detail to simulate the garment with the right bulk, tension, and edge behavior in 3D.
A welt pocket is a good example. The drawing may show the opening shape perfectly. The factory still needs the hidden decisions behind it:
- Pocket bag construction: self-fabric, pocketing, or lined
- Reinforcement method: bartacks, fusing, stay tape, or another support
- Visible stitch setup: stitch type, placement, and thread appearance
- Assembly order: whether the pocket is completed before seam closure or after panel joining
Without those choices written down, two suppliers can build the same sketch in two different ways. A 3D developer can also simulate it one way while the factory sews it another. That mismatch creates a quiet problem early. The digital sample gets approved, but the physical sample arrives with different shape, thickness, or drape at the exact area the team already signed off.
A good rule is simple. If a sewer, patternmaker, or 3D artist could ask "which one?" after reading the note, the note is still incomplete.
Factories treat construction details as operating instructions because that is what they are. The clearer the note, the fewer assumptions enter the line. Clear wording also makes standards easier to carry across categories. If your team always defines seam type, stitch type, allowance, SPI, reinforcement, and order of assembly in the same format, a dress factory, outerwear factory, and bag supplier are less likely to misread the spec in their own category-specific way.
That consistency saves time long before bulk production. It shortens sample comments, reduces rework, and gives both physical production and digital simulation the same source of truth.
What Construction Details Mean Inside a Tech Pack
A factory receives your sketch, builds a sample, and the shape looks close. Then you notice the collar rolls too softly, the hem ripples, and the pocket opening sits thicker than the approved 3D render. The drawing was not really the problem. The missing construction detail was.
Construction details are the build instructions inside the tech pack. They tell the factory and the 3D developer exactly how each area should be assembled so the product looks, performs, and repeats the same way. In apparel and product development, that usually includes seam type, stitch type, stitches per inch, seam allowance, thread color, finishing method, hardware application, label placement, and assembly order.
The sketch shows what the product should look like. Construction details explain how to make that result happen.
They sit inside the document the factory actually works from
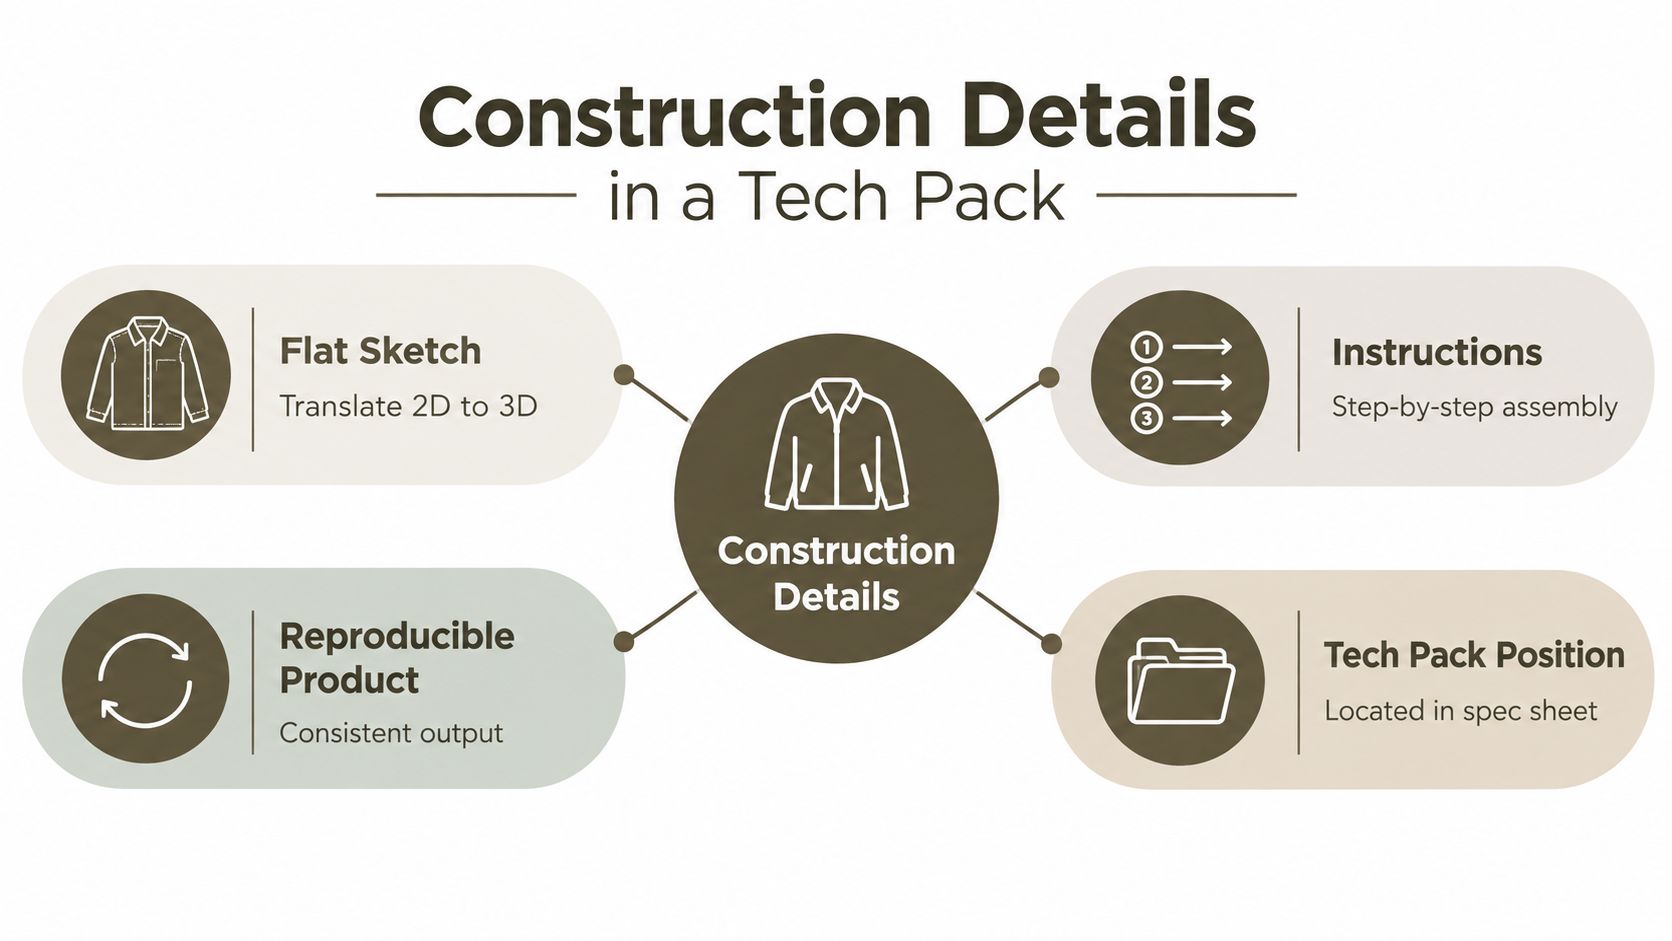
In practice, construction details live inside a tech pack beside technical flats, the bill of materials, measurement specs, and revision history. That matters because the tech pack is not just a design summary. It is the controlled reference a factory uses on the floor. If you need a plain-language refresher on the full document, this overview of what a tech pack is gives the broader context.
Scattered notes create avoidable errors. If seam information lives in one PDF comment, SPI in an email, and reinforcement notes in a fitting call, the factory has to piece the method together on its own. A 3D artist can run into the same problem and simulate one construction while production sews another.
One callout often carries three or four production decisions
A note such as "topstitch sleeve seam" sounds clear until you read it like an operator. Which stitch type? How far from the seam? Single needle or double needle? Visible from the outside only, or caught through all layers? The line needs those answers before sewing starts.
That is why factories read construction details like a blueprint. A sleeve callout might begin with "set-in sleeve," but the factory still needs the method under that label, such as:
- lockstitch or overlock used in assembly
- seam allowance
- finish at the raw edge
- reinforcement at the underarm or cap
- whether topstitching is visible, hidden, single, or double
A 3D developer needs many of those same decisions for simulation. Seam type affects bulk and turn of cloth. Stitch type and topstitch placement affect visual realism. Allowance affects edge behavior and how panels join digitally. If those notes are standardized across categories, your dress supplier, bag supplier, and digital team are all reading the same instruction language instead of translating your intent category by category.
For example, seam allowance is not just a number to fill in. It tells the factory whether there is enough fabric to join, trim, press, turn, and topstitch the area cleanly. If you need a practical reference, this seam allowance guide helps connect the spec to what the operator can physically sew.
A useful construction note answers three questions at once. What method is used, where it applies, and how exact the result needs to be.
That is what construction details mean inside a tech pack. They are the shared manufacturing language that turns design intent into repeatable instructions for both physical production and digital simulation.
Core Elements Every Construction Detail Should Cover
A factory reader should be able to move from your sketch to the sewing line without stopping to guess. Construction details do that job when they describe the method, the location, and the expected result in plain terms. For digital teams, the same note also needs to tell a 3D developer how the edge behaves, how layers stack, and what should appear on screen.
A useful way to organize the section is to treat each construction note like a small instruction block. One block for the neckline. One for the sleeve opening. One for the side seam. That format helps a sample room, a production line, and a digital simulation team read the same language across categories instead of translating a different system for tops, bags, and outerwear.
The fields you usually can't skip
Use this as a working audit list. If a detail changes function, appearance, bulk, or repeatability, write it down.
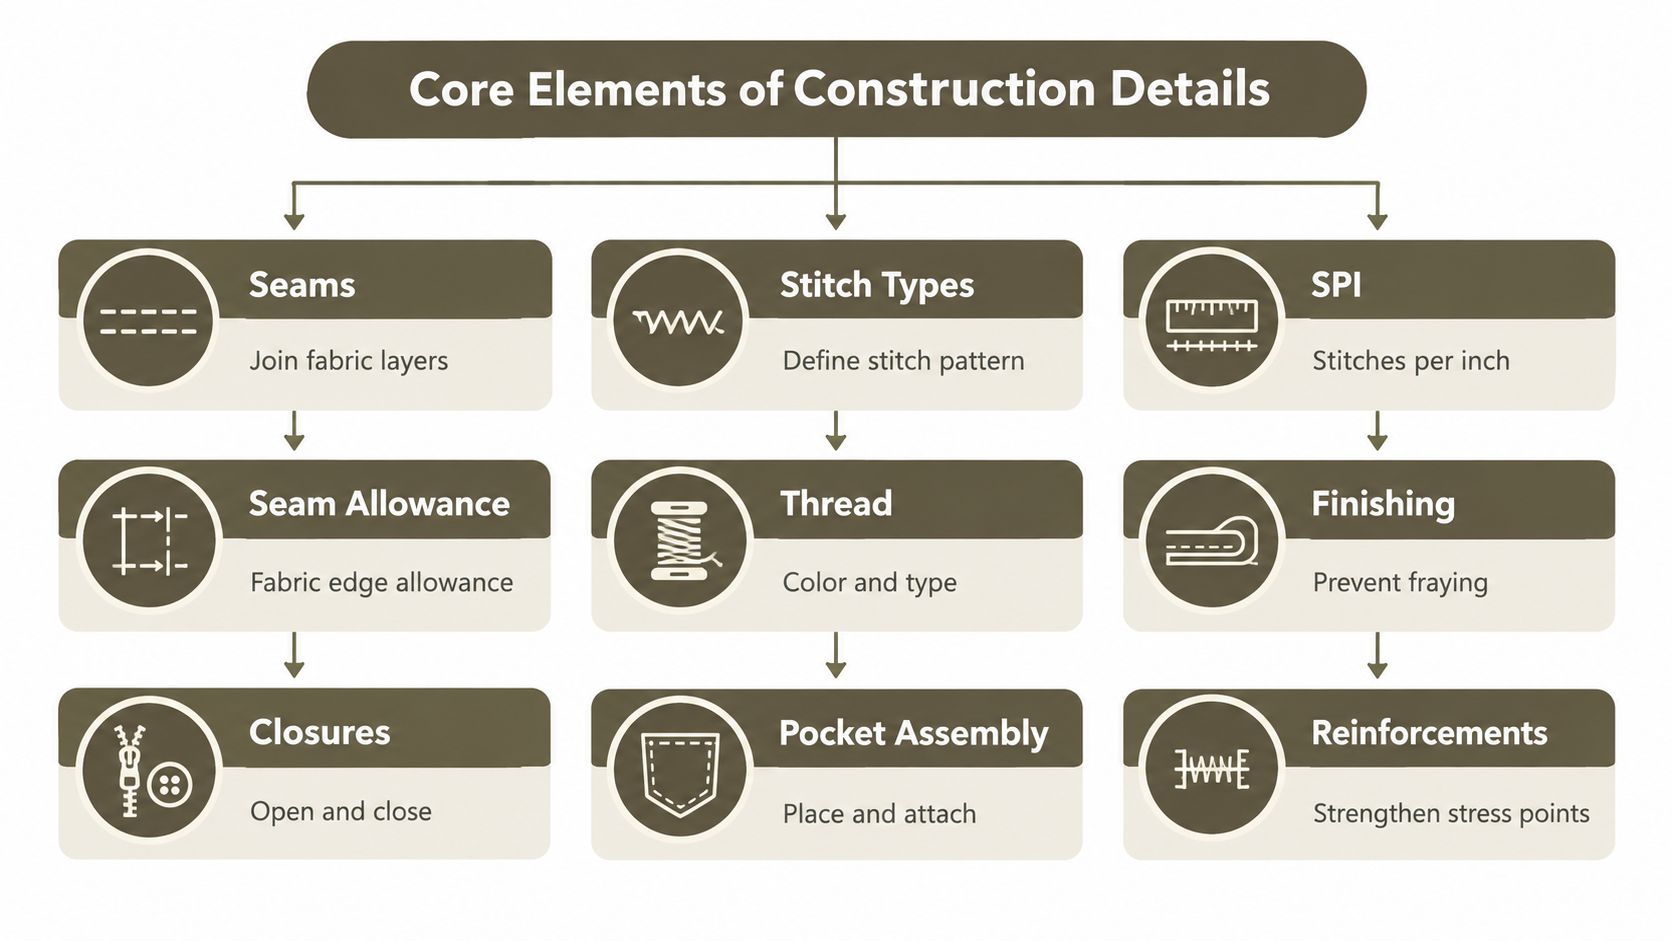
- Construction method: Name the actual build method for the area. Examples include plain seam, French seam, bound seam, turned-and-stitched edge, bagged-out lining, or welded edge. This is the first thing a factory needs to understand operator setup.
- Stitch type: Specify lockstitch, overlock, coverstitch, chainstitch, bartack, or another stitch where it affects assembly or appearance. A digital team also uses this to place visible stitch lines correctly.
- SPI or stitch density: State stitch density where strength or appearance depends on it, especially for topstitching and stress areas.
- Seam allowance or turn allowance: Record the allowance at the seam, hem, facing, or fold. In physical production this affects trimming, pressing, and turning. In 3D it affects panel joins and edge behavior.
- Thread specification: Include thread color and, when relevant, thread weight or topstitch thread type. A contrast topstitch and a hidden join should not share the same instruction.
- Edge finish: Call out whether the raw edge is overlocked, bound, folded clean, taped, pinked, or left exposed by design.
- Reinforcement: Note bartacks, stay tape, fusing, backing pieces, rivets, or extra stitch passes at stress points.
- Closure type and attachment: Identify the closure, its position, and how it is installed. “Zip at center back” is incomplete if the team still has to guess whether it is invisible, centered, lapped, or shielded by a facing.
- Internal components: List facings, interfacings, linings, elastic channels, support tapes, pads, or foam where they affect structure but do not appear on the outside.
- Assembly sequence: Add sequence only when order changes the outcome, such as trapping a lining, enclosing elastic, or attaching a pocket before a seam is closed.
For a broader document checklist beyond construction notes, this guide to spec sheet essentials for fashion designers helps place these fields inside the rest of the product spec.
Hidden layers need their own callouts
The outside view often hides the decisions that cause the most factory questions. A neckline may look clean on the flat sketch, but the build could be self-faced, separately faced, bound, or finished through the lining. Those are different operations, different bulk levels, and different simulation results.
That is why close-up views matter. Add enlarged details or sectional sketches anywhere the internal build changes the result. Facings, linings, interfacings, concealed plackets, enclosed waist elastics, and bagged hems are common problem areas. Guidance from Fashion Index on apparel tech pack construction details supports using close-up diagrams when standard views leave internal construction open to interpretation.
Mandatory versus situational
Some fields belong on nearly every style. Others depend on whether changing them would change the outcome.
| Detail type | Usually mandatory when | Often optional when |
|---|---|---|
| Construction method | The area could be built more than one way | The category has one approved standard and the note references it clearly |
| Seam allowance | Turning, pressing, enclosure, or topstitch distance depends on it | The allowance is fixed by an approved block and no variation is allowed |
| Stitch density | Topstitching is visible or durability is under review | An internal seam follows an established factory standard |
| Reinforcement | Stress points, closures, corners, handles, or openings are present | The area carries no load and has no stability concern |
| Assembly sequence | Layers can be trapped, enclosed, or blocked later | The order does not change construction or finish |
Use one simple test. If a factory, patternmaker, or 3D developer could make a different choice and still claim the note was followed, the instruction is not finished.
Good construction details remove that gap. They standardize what gets written, how it gets read, and how the same product intent survives across physical sampling, production, and digital simulation.
Why Clear Construction Details Prevent Rework and Delays
A sample room receives a note that says only: Overlock side seam. One factory runs it as a quick closed overlock. Another joins with lockstitch first, then overlocks the raw edge. A 3D developer building the same style in CLO or Browzwear has to guess which seam behavior to simulate. Three people follow the note. Three different results show up.
Now compare that with: Join side seam with lockstitch, clean with overlock finish, 10 SPI, 3/8-inch seam allowance, thread to match body.
The second note closes the decision gaps. It tells the sewing line how to build the seam, and it gives the digital team enough information to choose the right seam behavior, edge treatment, and visual finish in the virtual sample.
What the stronger note prevents
A construction note works like a route card on a factory floor. If one step is missing, the operator fills in the blank from habit. That habit may be correct for one vendor and wrong for another.
In the stronger example, each part answers a different production question:
- Join method: lockstitch first, not overlock-only
- Finish method: raw edge is cleaned with overlock
- Stitch density: 10 SPI sets the visual and performance target
- Allowance: 3/8-inch tells pattern, sewing, and QC what width must be held
- Thread direction: body-matched thread settles the appearance before sampling starts
Those details also matter in digital simulation. A virtual seam that is built as stretch overlock will drape and pull differently from one built as a stable lockstitch seam with an overlocked edge. If the physical sample and the 3D file are based on different assumptions, fit reviews get noisy fast. The team starts commenting on problems created by documentation, not by the design itself.
Where rework actually starts
Rework usually does not begin at final inspection. It starts much earlier, at the first point where two readers can interpret the same sentence differently.
A missing seam allowance can change panel size after turn of cloth. A missing stitch type can change seam strength and appearance. A missing sequence note can trap a layer, expose a raw edge, or force the factory to open and resew a section later. In bags, footwear, and outerwear, one unclear reinforcement note can also shift hardware stability and wear performance.
This is why clear construction details need to be standardized, not written from memory every time. If one tech pack says "edge stitch," another says "single needle TS," and a third says "topstitch 1/16 from edge," suppliers may treat those as three different instructions, even if the design team meant the same operation. Standard field structure reduces those translation errors.
The operational payoff
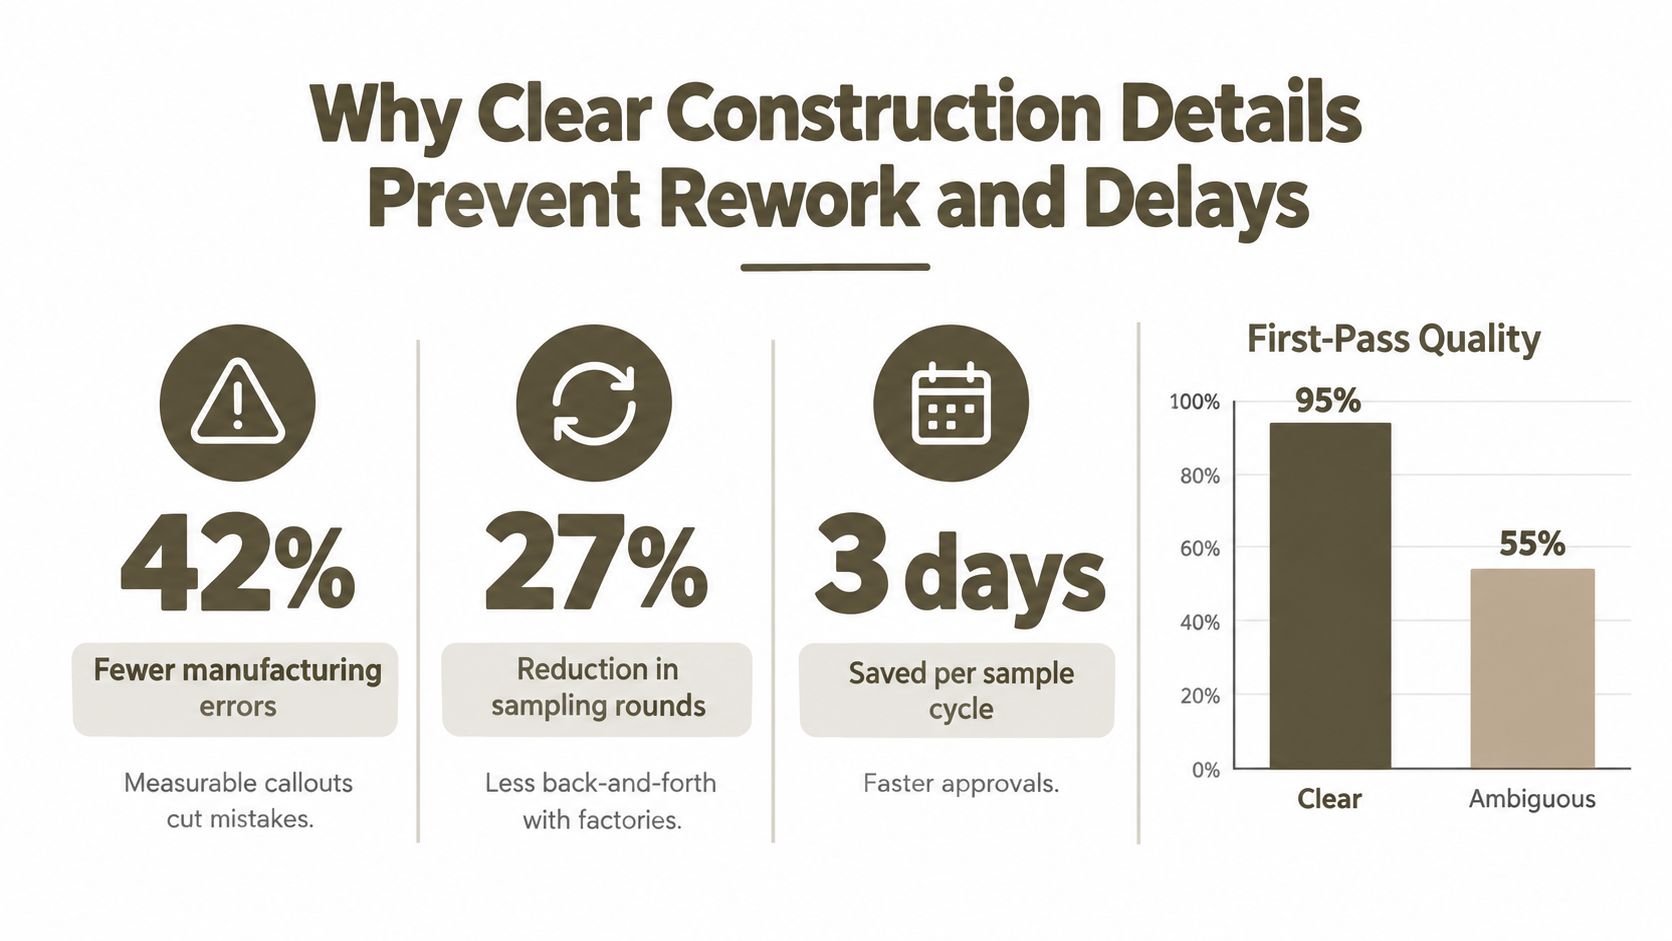
Clear construction details reduce sample comments that should never have existed. They also make vendor transfers less painful because the build logic lives in the document instead of in one factory's habits.
The benefit is practical:
- fewer clarification emails
- fewer sample revisions caused by preventable interpretation gaps
- cleaner cost comparisons between vendors
- better alignment between physical prototypes and 3D simulations
- easier QC because inspectors can check against specific, repeatable instructions
Clear construction details make the product easier to reproduce across suppliers, sample rounds, and digital tools.
If you have ever handed a style to a new factory and heard, "We built it the way we usually do," you have seen the problem. Factories do read specs carefully. They also protect speed by defaulting to known methods when the spec leaves room for choice. Good construction notes remove that room for choice where it matters.
Construction Terminology Across Product Categories
A junior designer writes "edge stitch" on a bag, "topstitch near edge" on a jacket, and "1/16 stitch from edge" on a shoe tab. Three products. Three phrases. One factory may read those as the same instruction. Another may price or build them as three different operations.
That is why category terminology needs a shared frame. The product can change. The build logic should not.
Construction language works like a parts map. In apparel, you may talk about seams, seam allowance, and SPI. In footwear, the same idea may show up as lasting margin, skive, edge paint, or bonding area. In furniture, the words shift again to joinery, corner blocks, upholstery seams, and attachment points. The labels differ, but the factory is still looking for the same practical answers: what joins to what, how it is secured, how far from the edge it sits, what supports the stress point, and in what order the operation happens.
Use one field structure across categories
Teams that work across categories usually get better results when they standardize the fields first and let the category-specific terms sit inside those fields. A fixed structure keeps the document readable for both a sewing floor and a 3D workflow.
| Construction Field | Apparel Example | Footwear and Accessories Example | Home and Hard Goods Example |
|---|---|---|---|
| Join method | Side seam joining front to back panel | Upper joined to lining or strap joined to body | Panel joined to frame or shell joined to housing |
| Stitch or attachment type | Lockstitch, overlock, coverstitch | Edge stitch, binding stitch, bonded seam | Screw attachment, staple line, adhesive bond |
| Allowance or margin | 3/8-inch seam allowance | Turn allowance on leather edge | Material overlap or edge clearance |
| Reinforcement | Bartack at pocket opening | Backer patch under hardware | Bracket, washer, corner block, internal support |
| Finish | Clean finished edge, bound seam | Painted edge, folded edge, raw edge sealed | Sanded edge, coated edge, deburred edge |
| Hardware placement | Zipper position, snap location | Buckle placement, D-ring position | Handle location, hinge placement, cable exit |
| Assembly order | Pocket before side seam close | Strap before lining close | Frame assembly before upholstery or enclosure close |
This structure helps in a simple way. It separates the question from the vocabulary. First define the field. Then fill in the category term that answers it.
Keep names stable even when methods differ
Stable naming reduces translation errors between design teams, vendors, and software. If one column always captures reinforcement and another always captures edge finish, the reader knows where to look even if the product switches from knitwear to handbags to seating.
Factories read this the way a builder reads a blueprint. They do not need your team to use garment words on a wood frame. They need clear equivalents. A furniture maker still needs direct instruction about join points, reinforcement, surface finish, and order of operations. For a craft-based example outside apparel, Vinson Fine Furniture furniture making shows how much build quality depends on those details being defined before assembly starts.
Digital simulation needs the same logic, with more explicit inputs
Physical production can sometimes tolerate shorthand because an experienced sample room fills in gaps from habit. Digital simulation is less forgiving. The software needs the construction note translated into usable inputs such as seam type, fold direction, thickness build-up, edge treatment, and allowance values.
Industry guidance from CLO's documentation makes this clear in practice. To simulate garments accurately, users must assign sewing line relationships, seam allowances, fold settings, and material behavior intentionally, not leave them implied in a sketch or a vague note (CLO help center on sewing and construction setup). That is the same reason standardized construction fields matter. They help a human builder and a digital system read the same intent.
A good test is simple. If a factory technician can build it, and a 3D designer can simulate it, the terminology is doing its job. If either one has to guess, the note is still incomplete.
Examples That Show Factory Ready Construction Details
A factory receives your tech pack, makes a sample, and the side seam twists, the pocket corners pucker, and the 3D prototype does not match the physical build. In many cases, the sketch was fine. The construction note was the weak point. A factory-ready note has to work like a build instruction, not a reminder to yourself.
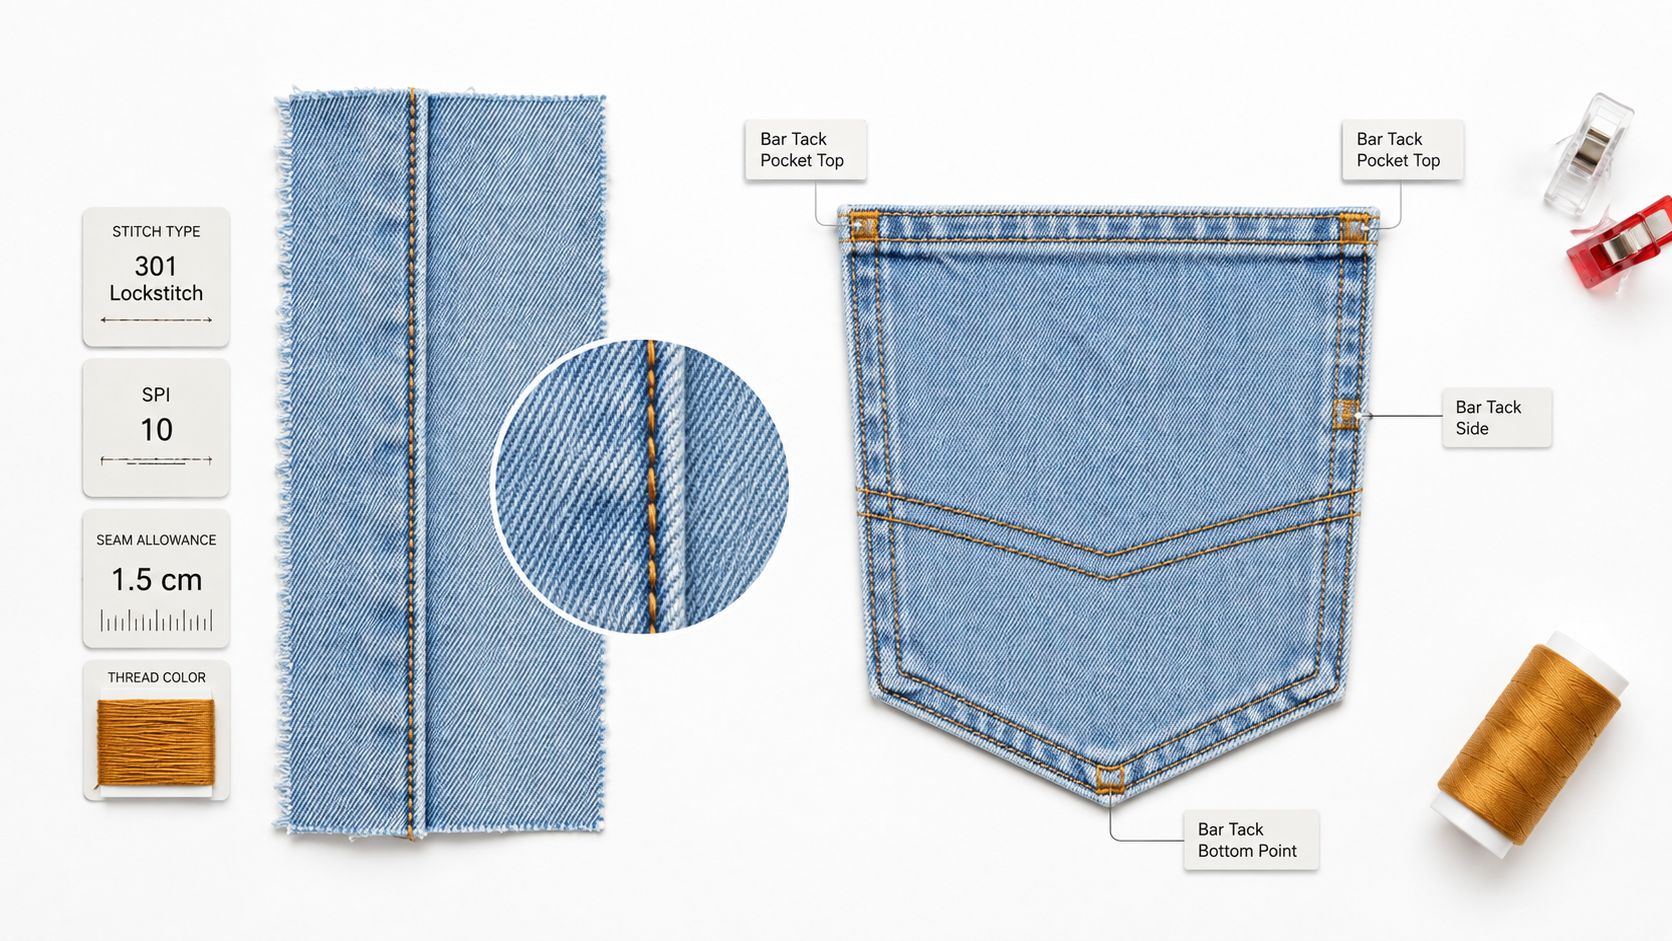
The fastest way to train your eye is to compare a note that invites guessing with one that controls the result. Do not copy these lines exactly. Copy the structure behind them. Good notes answer three questions at once: what gets joined, how it gets built, and what another team needs to reproduce the same result in a digital model.
Example one side seam
A side seam sounds simple until two teams build it two different ways.
Vague note
- side seam overlock
- clean inside
- match sample
That wording leaves gaps. The operator does not know whether the panels are joined with lockstitch first or only serged together. The patternmaker does not know which seam allowance the sewing line assumes. The 3D team does not know whether the seam should roll, spread open, or press to one side in simulation.
Factory-ready note
- Join front and back side seam with 301 lockstitch.
- Finish seam allowance together with 504 overlock.
- Use 3/8-inch seam allowance.
- Sew at 10 SPI.
- Thread color matches body.
- Press seam toward back.
- Match waist seam, pocket opening, and hem at side seam during assembly.
- Digital build uses same seam allowance and pressed-to-back direction.
That last line matters because it keeps the physical sample and the digital sample reading from the same instruction. The sewing floor sees assembly intent. The 3D designer sees the inputs needed to recreate bulk and direction.
Example two patch pocket with reinforcement
Pockets fail at stress points, not in the middle. A sketch usually shows the outline. The note has to show the support.
Weak note
Pocket on front panel. Topstitch around edge.
A factory can sew that several different ways. Some methods hold shape better. Some collapse after wash. Some look fine in a first sample and fail after wear.
Factory-ready note
- Fuse reinforcement to wrong side of pocket opening area before folding.
- Turn top edge to specified depth and secure with single-needle topstitch.
- Fold side and bottom seam allowances, then press before placement.
- Place pocket to front panel using flat measurement from placement callout.
- Topstitch side and bottom edges at specified distance from folded edge.
- Add bartacks at both top pocket corners.
- In 3D, assign folded edge thickness at pocket turnbacks and include bartack points in review notes.
That is how you reduce interpretation. The sequence is clear. The reinforcement is clear. The digital team also knows the pocket is not just a flat shape pasted onto the garment. It has folded edges, thickness, and stress points.
Written construction notes and annotated sketches work like a map and a legend. One shows where the part goes. The other explains how to read it.
Example three waistband with trapped layers
This is the type of area factories misread when the note is too short, because part of the construction disappears after closing.
Too loose
- attach waistband
- close inside clean
- edge stitch
Factory-ready
- Join outer waistband to pant body with 1/2-inch seam allowance.
- Attach inner waistband at top edge, right sides together.
- Grade seam allowances to reduce bulk at top edge.
- Turn waistband to inside and understitch inner waistband where applicable.
- Fold inner waistband seam allowance under and secure by stitch-in-ditch from face, unless topstitch version is approved.
- Edge stitch top waistband edge at specified distance.
- Keep button extension length per pattern.
- In digital simulation, set stacked layer thickness at waistband seam and folded inner waistband edge.
This example shows why standardized wording helps across categories. Whether the product is jeans, trousers, a skirt, or shorts, the logic stays the same. Join method, allowance, turn direction, visible stitch, hidden finish, and layer build-up all need a place in the note.
Example four category translation
Standardization does not mean using apparel words everywhere without adjustment. It means keeping the instruction fields consistent even when the product changes.
For a shirt placket, you might specify fold width, fuse area, edge stitch distance, and buttonhole spacing. For a bag handle tab, you would still specify join point, reinforcement, stitch path, turnback, and visible topstitch. Same framework, different part.
A useful template looks like this:
- component name
- operation sequence
- stitch or join type
- seam or turn allowance
- reinforcement
- press or fold direction
- visible finish
- digital simulation input if bulk, fold, or tension affects appearance
That is what makes a note factory-ready. It can travel across product categories without losing meaning, and it can be read by both the sewing line and the digital team without guesswork.
Building Better Tech Packs With Complete Construction Details
A final tech pack review should answer one practical question. If a factory receives this file at the end of your workday, can the sample room sew it correctly, and can the digital team simulate it without sending a list of follow-up questions in the morning?
That is the standard to review against. A complete page is not the goal. A buildable page is.
Use the last pass to check whether each construction note does two jobs at once. It has to guide physical assembly on the floor, and it has to describe the same build clearly enough for digital modeling, costing logic, and structured data systems. If the note only makes sense to the person who wrote it, it is still incomplete.
A practical review usually covers these points:
- Join and finish are both stated: every major seam names how parts are attached and how the raw edge or inside is finished
- Behavior-changing allowances are called out: any allowance, foldback, or turn that changes bulk, shape, or sew method is documented where it occurs
- The fit context is clear: flat measurements, stretch effect, and body-shaped appearance are distinguished when that changes the intended result
- Internal build is visible: facings, pocket bags, interlinings, and other hidden parts have callouts or sectional views
- Operation order is readable: trapped layers, closures, and turn-and-close steps are listed in the order a sewer would handle them
- Digital inputs are named where needed: thickness, fold memory, layer stacking, or tension-sensitive areas are noted if they affect simulation accuracy
- Revision control is clean: the current instruction lives in the file, not across comments, chats, and old PDFs
If you need a last-pass review before release, this tech pack checklist before you send is a useful companion.
This matters even more as teams try to turn apparel instructions into machine-readable product data. Notes that are standardized by field, such as component, operation, stitch, allowance, reinforcement, visible finish, and simulation input, are easier to reuse across categories and easier for software systems to interpret. A freeform sentence can work for one skilled sample maker. Structured construction language works better when many people and tools touch the same style.
One practical option for teams working across categories is Genpire, which includes an agentic tech pack workspace with construction details and component breakdowns in the same workflow as concepting and production assets. The useful part is not the AI label by itself. It is having construction information organized in one commentable file instead of split across disconnected tools.
Good construction details make a tech pack read like a clear assembly map. The sewer sees the stitch path. The patternmaker sees the turn and tolerance. The digital team sees the layer build and behavior. When all three can read the same note the same way, sampling gets faster and misreads drop.